Knowledge Base · Inventory and Manufacturing
Applies to: Connected 10.2+ | Platform: macOS, PC, Cloud
As the saying goes, "A picture is worth a thousand words." These images are displayed on the Inventory item window and can be printed on Sales Quote, Sales Order, Packing Slip, and Invoice forms.
ARTICLE CONTENTS
- Enabling Item Images
- Attaching an Image to an Inventory Item
- Printing Inventory Images on Forms (Quotes, Orders, and Invoices)
- Related Articles
- Reference Links
1. Enabling Item Images
Before using inventory item images, the Note Attachment feature must be enabled. This requirement is for the image storage location as images are not stored within the data file. See the Attaching Files in Connected article for more information on how to enable.
Once the Note Attachments feature is enabled, use the following steps to enable inventory images.
- Select
File → Company Setup → I/C Defaults, as shown in the following screen.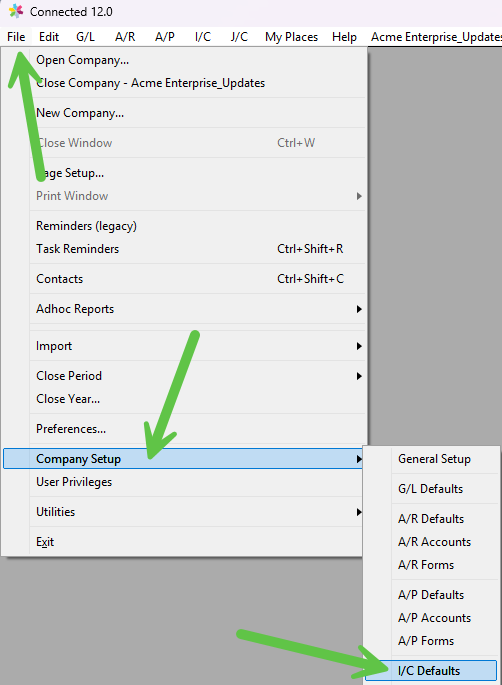
- Click the Items tab and select the Use Item Imagescheckbox as shown below.
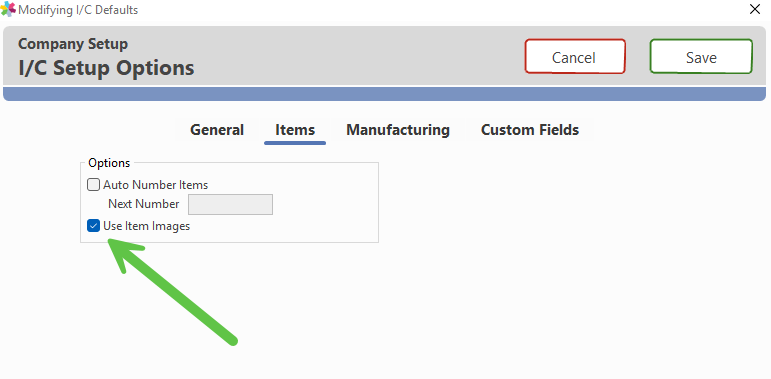
- Click OK to exit the I/C Defaults and save the changes.
2. Attaching an Image to an Inventory Item
Once the Use Item Images has been enabled the Inventory screen will change to show a place holder for an image. Images can be assigned whichever items require them.
To link an image to an Inventory item:
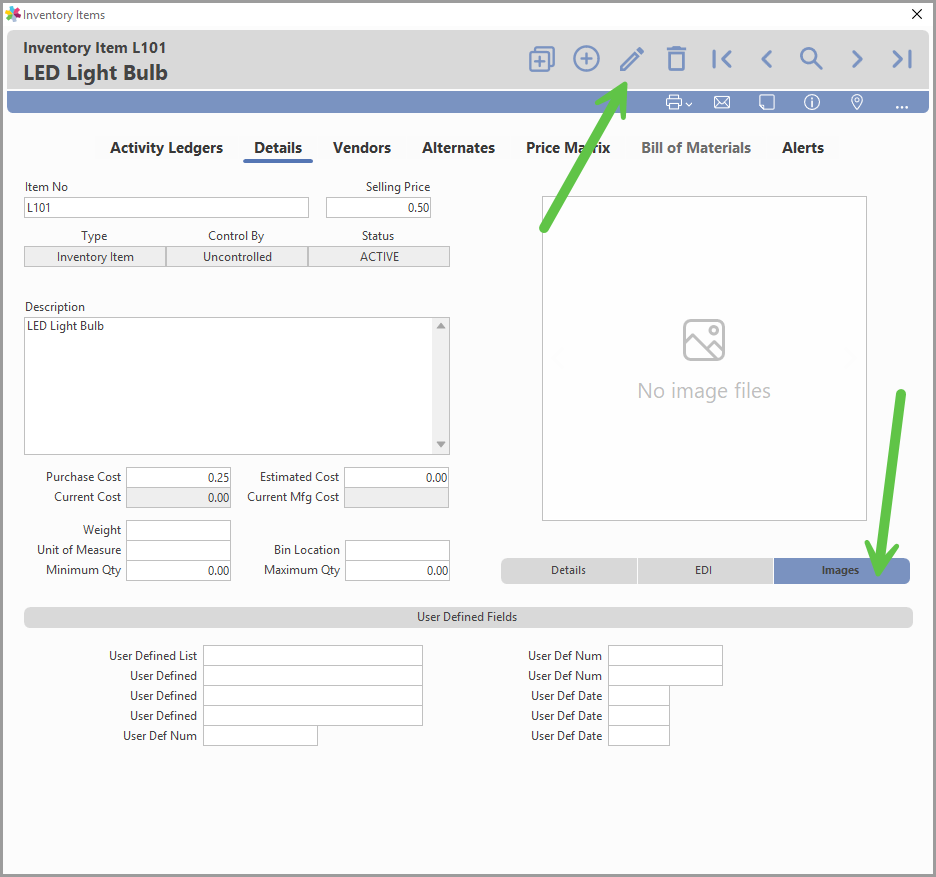
- Locate the Inventory Item in the Inventory Items window or by using the Item Query window. Select the Image Tab (it will say No Images if there are none added). Click Modify, as shown below. Images can only be added when editing an item.
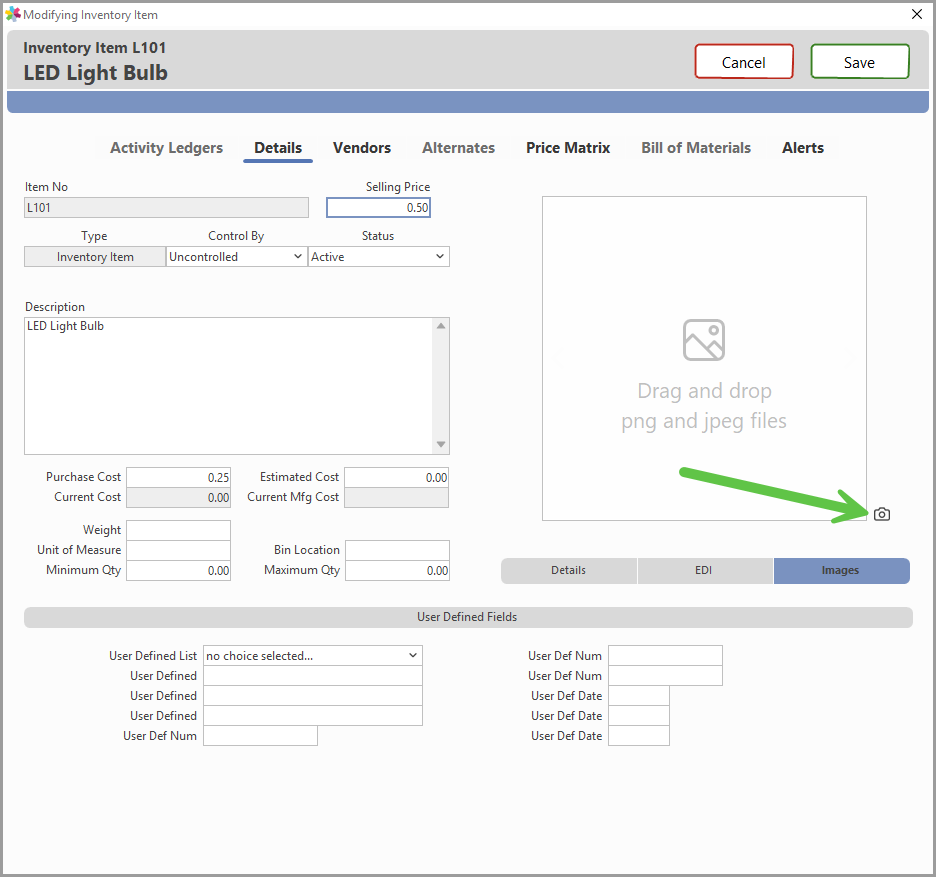
- Click the Camera Icon at the bottom right corner of the image slot, as shown in the following screen.
- The window shown below will open. Click the +to add an image.
NOTE
Only JPG or PNG files can be used.
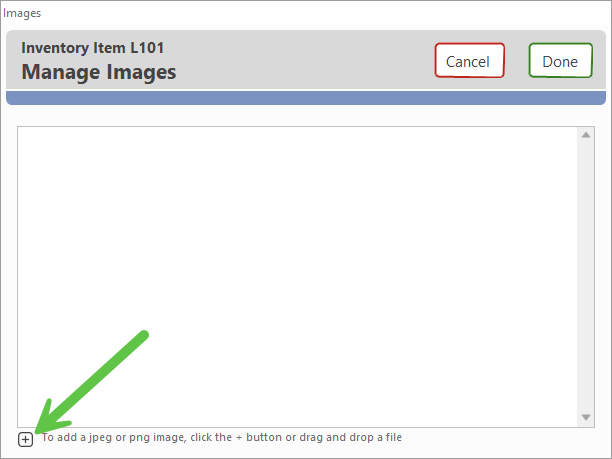
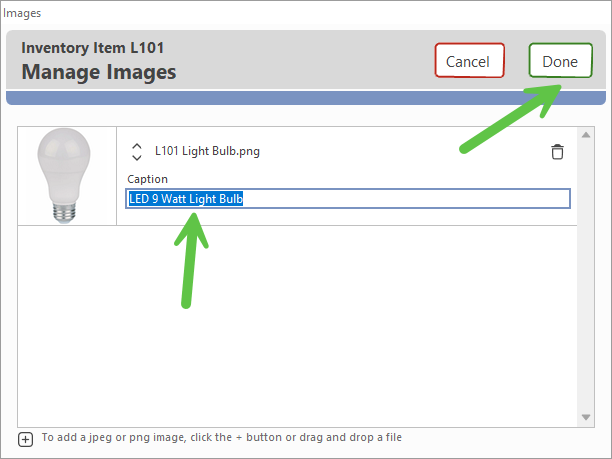
- Select the file to be attached to the Inventory Item. A caption can be entered for easy reference. Press Donewhen finished attaching images.
- The image selected will display in the image box. Press Saveto save the changes.
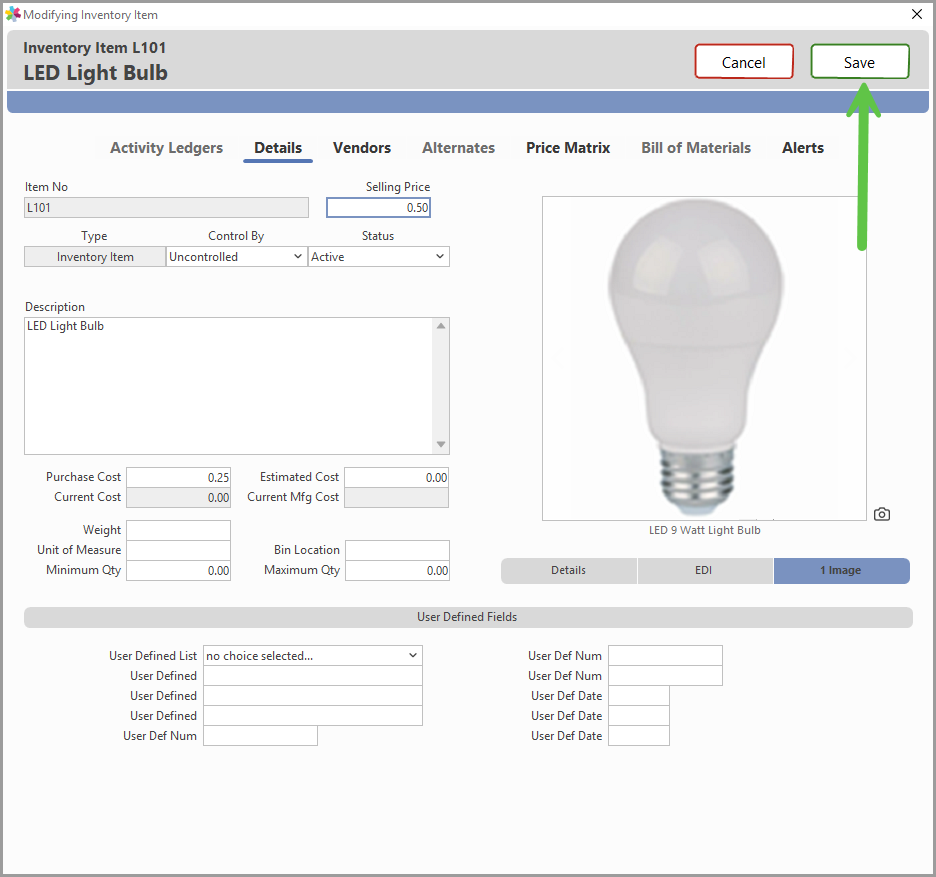
NOTE Multiple images can be added to a single item with one being designated as the primary image. |
3. Printing Inventory Images on Forms (Quotes, Orders, and Invoices)
Inventory Items with images can have these images printed on PDF or hard copies of Sales Quotes, Sales Orders, Packing Slips, and/or Invoice forms. To print a form with images, the correct form template needs to be selected.
To select a form that supports the inclusion of images:
- Select
File → Company Setup → A/R Forms, as shown in the following screen.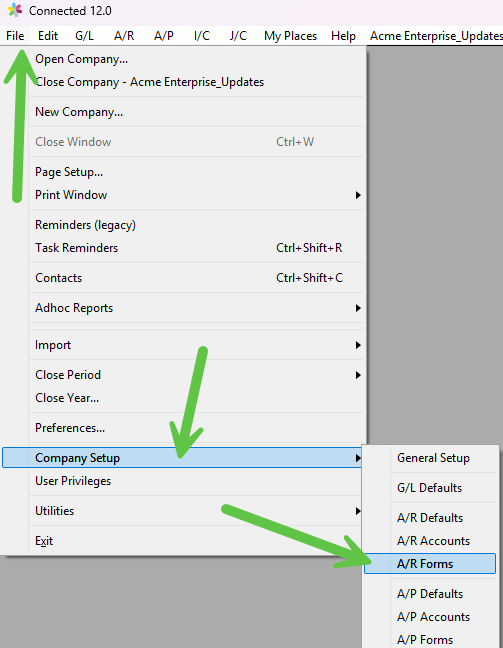
- Choose from one of the supported forms in the Show Forms: pull down menu. The following screen shows an example for the Sales Order form. After the form has been selected, choose the correct form template to use. In the Sales Order example below, there is two forms that can be used: 1) Plain Paper w/Images; 2) Plain Paper w/Multi-images.
NOTE
The default forms with images may require additional layout customization. If the data file already has customized forms, the layout will need to be re-applied to the forms with images.
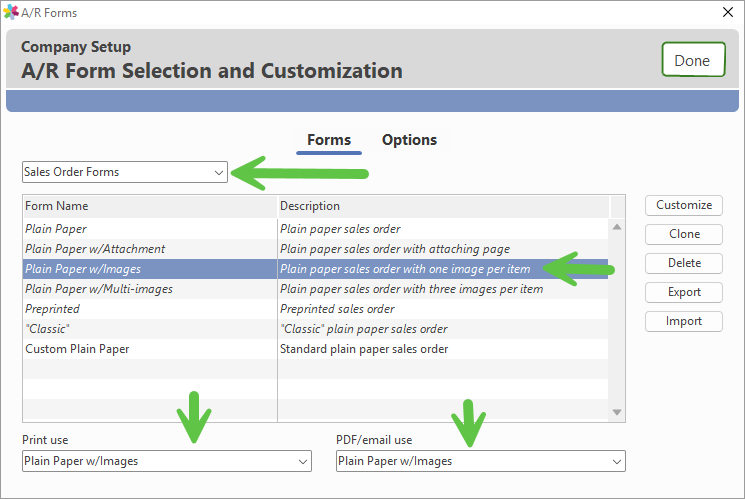
- If the form should be the default for both Print and PDF use, it can be designated in the bottom portion of the window.
TIP
It is recommended to test print forms with images prior to making them the default selections.
The same process can be repeated for the Sales Quote, Packing Slip, and Invoice forms as required.
4. Related Articles
- Inventory Count Sheets and Inventory Adjustments
- Manufacture - Custom Workflow Staging List
- Allocating Labor and/or Overhead to Manufactured Parts
- Inventory Costing Methods
- Connected 10.2 Change Log - September 2020
- The Software Subscription Trap
5. Reference Links
Was this article helpful?
That’s Great!
Thank you for your feedback
Sorry! We couldn't be helpful
Thank you for your feedback
Feedback sent
We appreciate your effort and will try to fix the article