Knowledge Base · Email Documents
Applies to: Connected 12, Connected on Demand
NOTE Connected Mail requires Connected 12 or Connected on Demand. |
Leveraging an external direct email process is an excellent way to manage outbound email communications from Connected. By not relying on third-party applications like Microsoft Outlook, Connected is less likely to encounter issues caused by updates to those external programs. For example, the "New Outlook" option shown on most PC's that is incompatible with Connected.
ARTICLE CONTENTS
1. Connected Mail System Requirements
Using Connected Mail requires the following:
- Connected on Demand or Connected 12
- A valid SMTP email account
- Connection to the internet
Connected Mail is designed to send outbound email from within Connected. Sending documents like order confirmations, customer invoices, statements, purchase orders, and sales quotes are all supported with Connected Mail. Simply put, Connected Mail works in all places that email previously worked and replaces the need for a third party application.
2. Setting up a Users Account
For each user, under Preferences, there is a tab called Email. Under the Email tab is where all the settings can be entered and saved for an external email.
To enable Connected Mail (for specific users):
- While logged into the the specific user account, select
File → Preferences.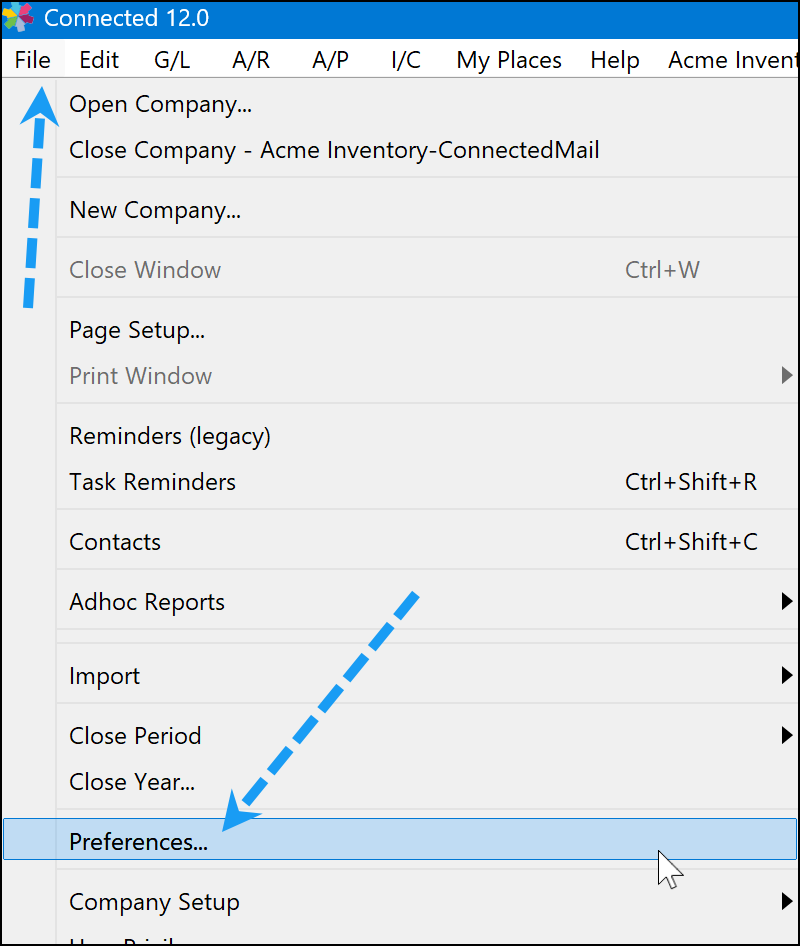
- In the Preferences window select the Email tab.
- Select the Connected Mail option in the Send Email Via dropdown list, as shown in the following screen.
NOTE
A Connected user account can use either MS Outlook (PC and macOS), Apple Mail (macOS only), or Connected Mail. However, only one method can be active for an account at a time.
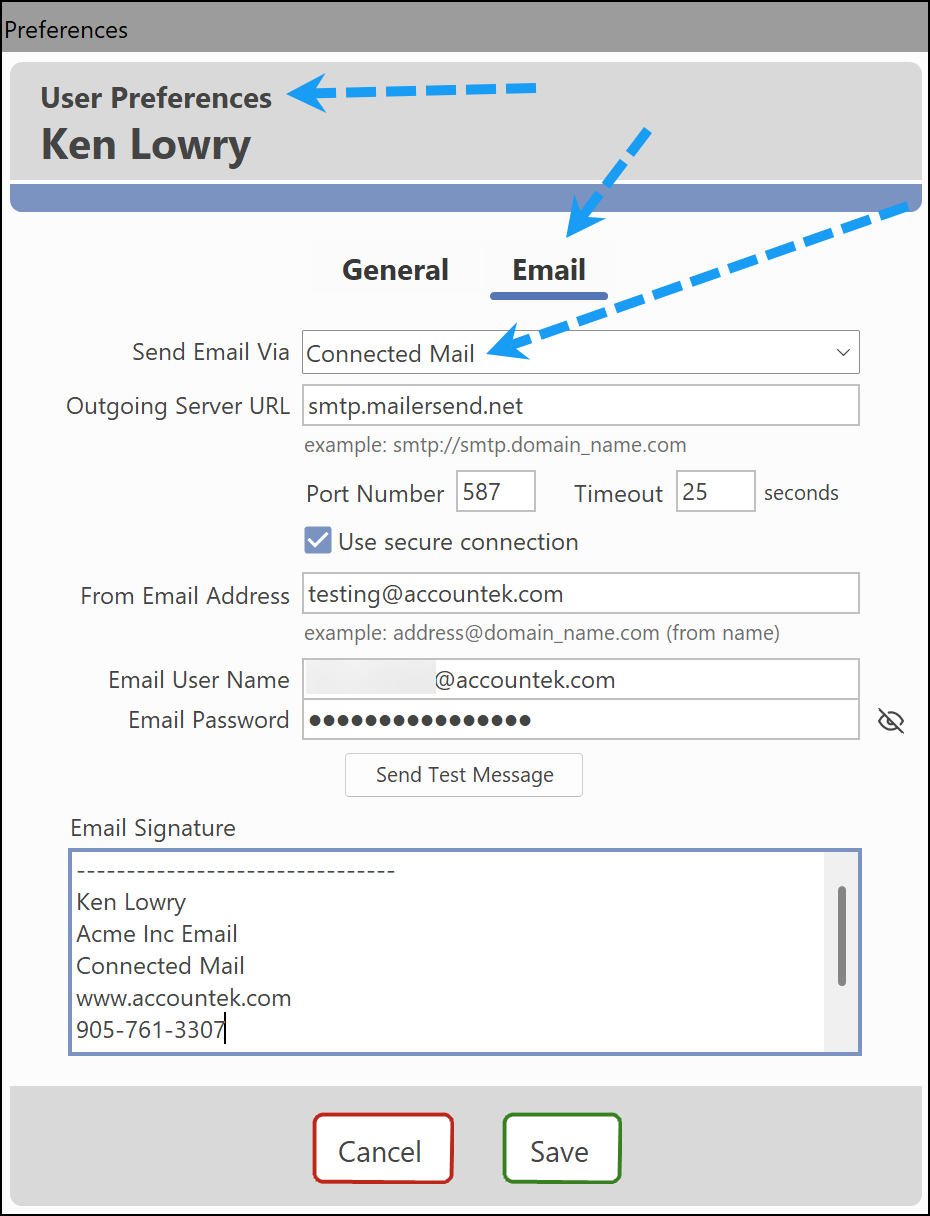
- Once Connected Mail has been selected, the following information will be required:
NOTE
In this example the Mailersend service is used, integrated to an Office365 account. Click for → Mailersend info and pricing.
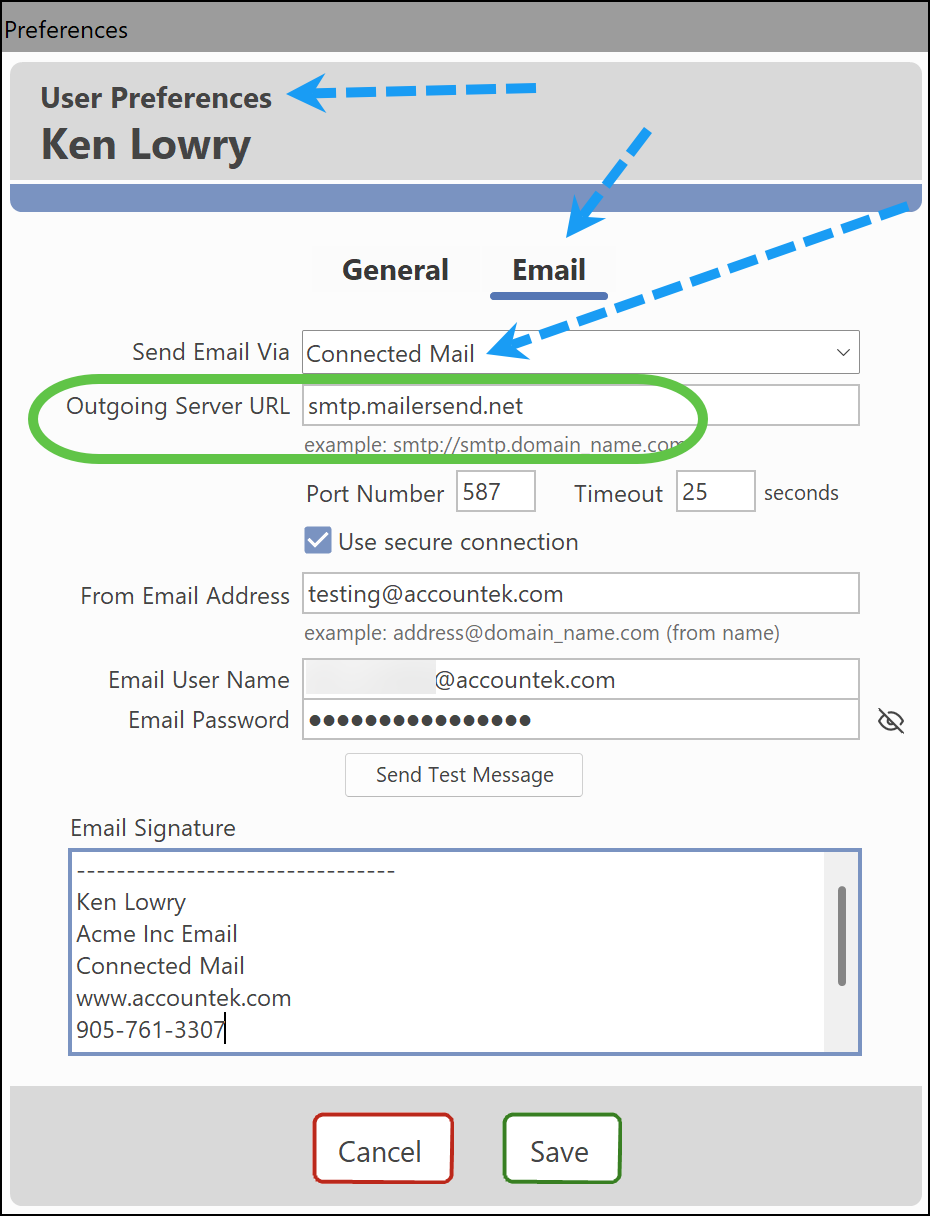
Outgoing Server URL
Port Number
From Email Address
Email User Name
Email Password
Email Signature (This can be used with Connected Mail or Application based Mail)
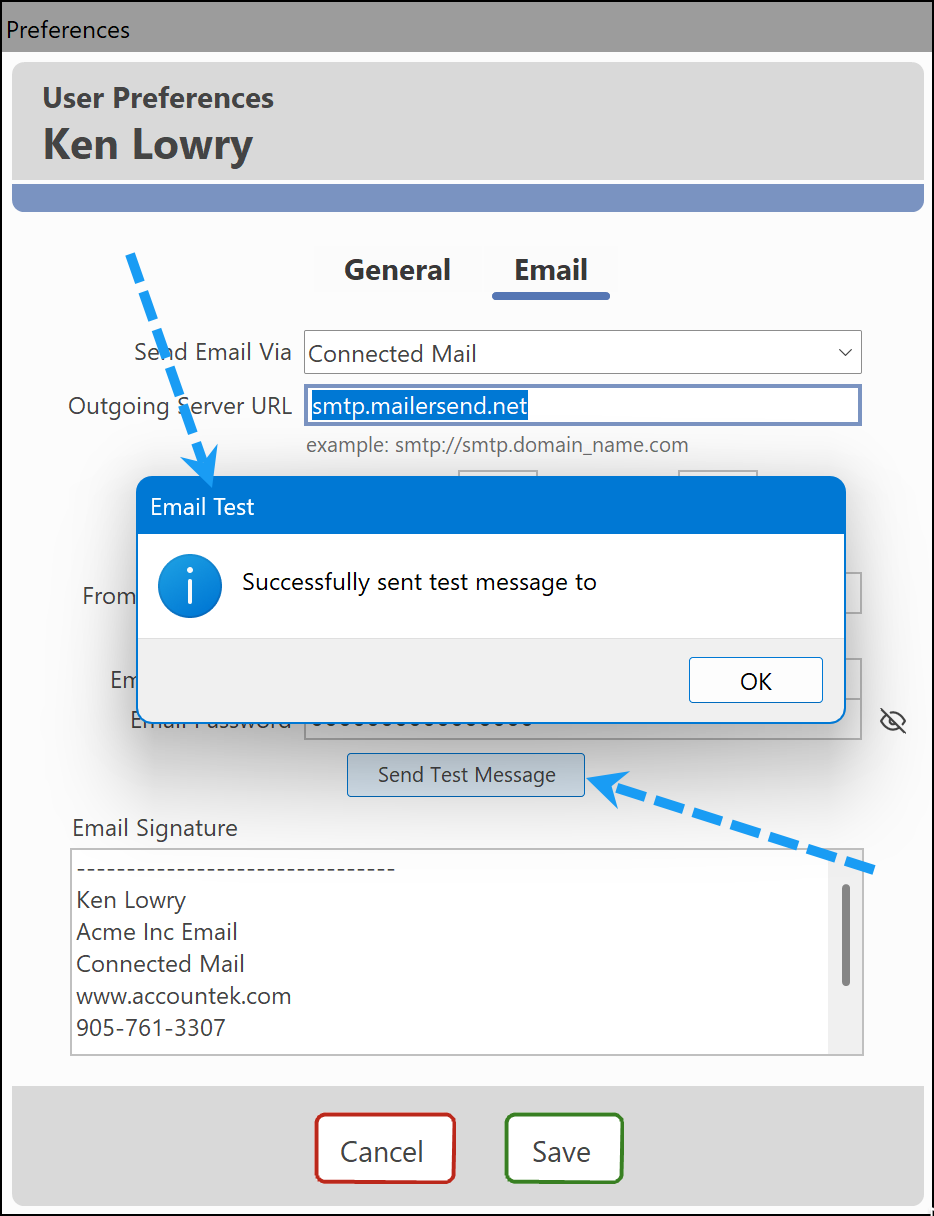
- Send a test message via the Send Test Message button, and if the setup is correct, a message indicating a successful test will appear.
- Click Save to keep the information entered. Once Save is selected, the Preferences window will close.
3. Sending Emails
Once the set up is complete, and a successful test email has been sent, then a user can simply use the existing process to email documents directly from Connected. Reference Link: Email from Connected
TIP Some customers want to see all email communication in one shared folder. A common practice is to create a email that acts as a common folder and have all emails sent from Connected to also BCC this address. This can be saved in the Connected Email Templates. Using a BCC address is strongly recommended when using Connected Mail so that items sent, without an email application, can easily be verified. |
Was this article helpful?
That’s Great!
Thank you for your feedback
Sorry! We couldn't be helpful
Thank you for your feedback
Feedback sent
We appreciate your effort and will try to fix the article