Knowledge Base · Purchasing and Payables
Module: Accounts Payable | Applies to: All Connected versions | Prepared: August 2026
This article walks through entering non-inventory bills from vendors and editing the general ledger accounts, and how to enter vendor credits, which are entered as Purchase “Debits.”
NOTE Inventory bills are entered by matching against Purchase Orders. This article covers non-inventory purchases only. |
ARTICLE CONTENTS
- Entering Vendor Purchases (aka Bills)
- Changing the Default Accounts on a Purchase
- Entering Purchase Debits (aka Credits)
- Posting Purchases
1. Entering Vendor Purchases (aka Bills)
As invoices are received from vendors, they are typically entered into the Purchases window. As bills are entered, the amounts update the vendor balances as they are posted.
To enter a vendor purchase:
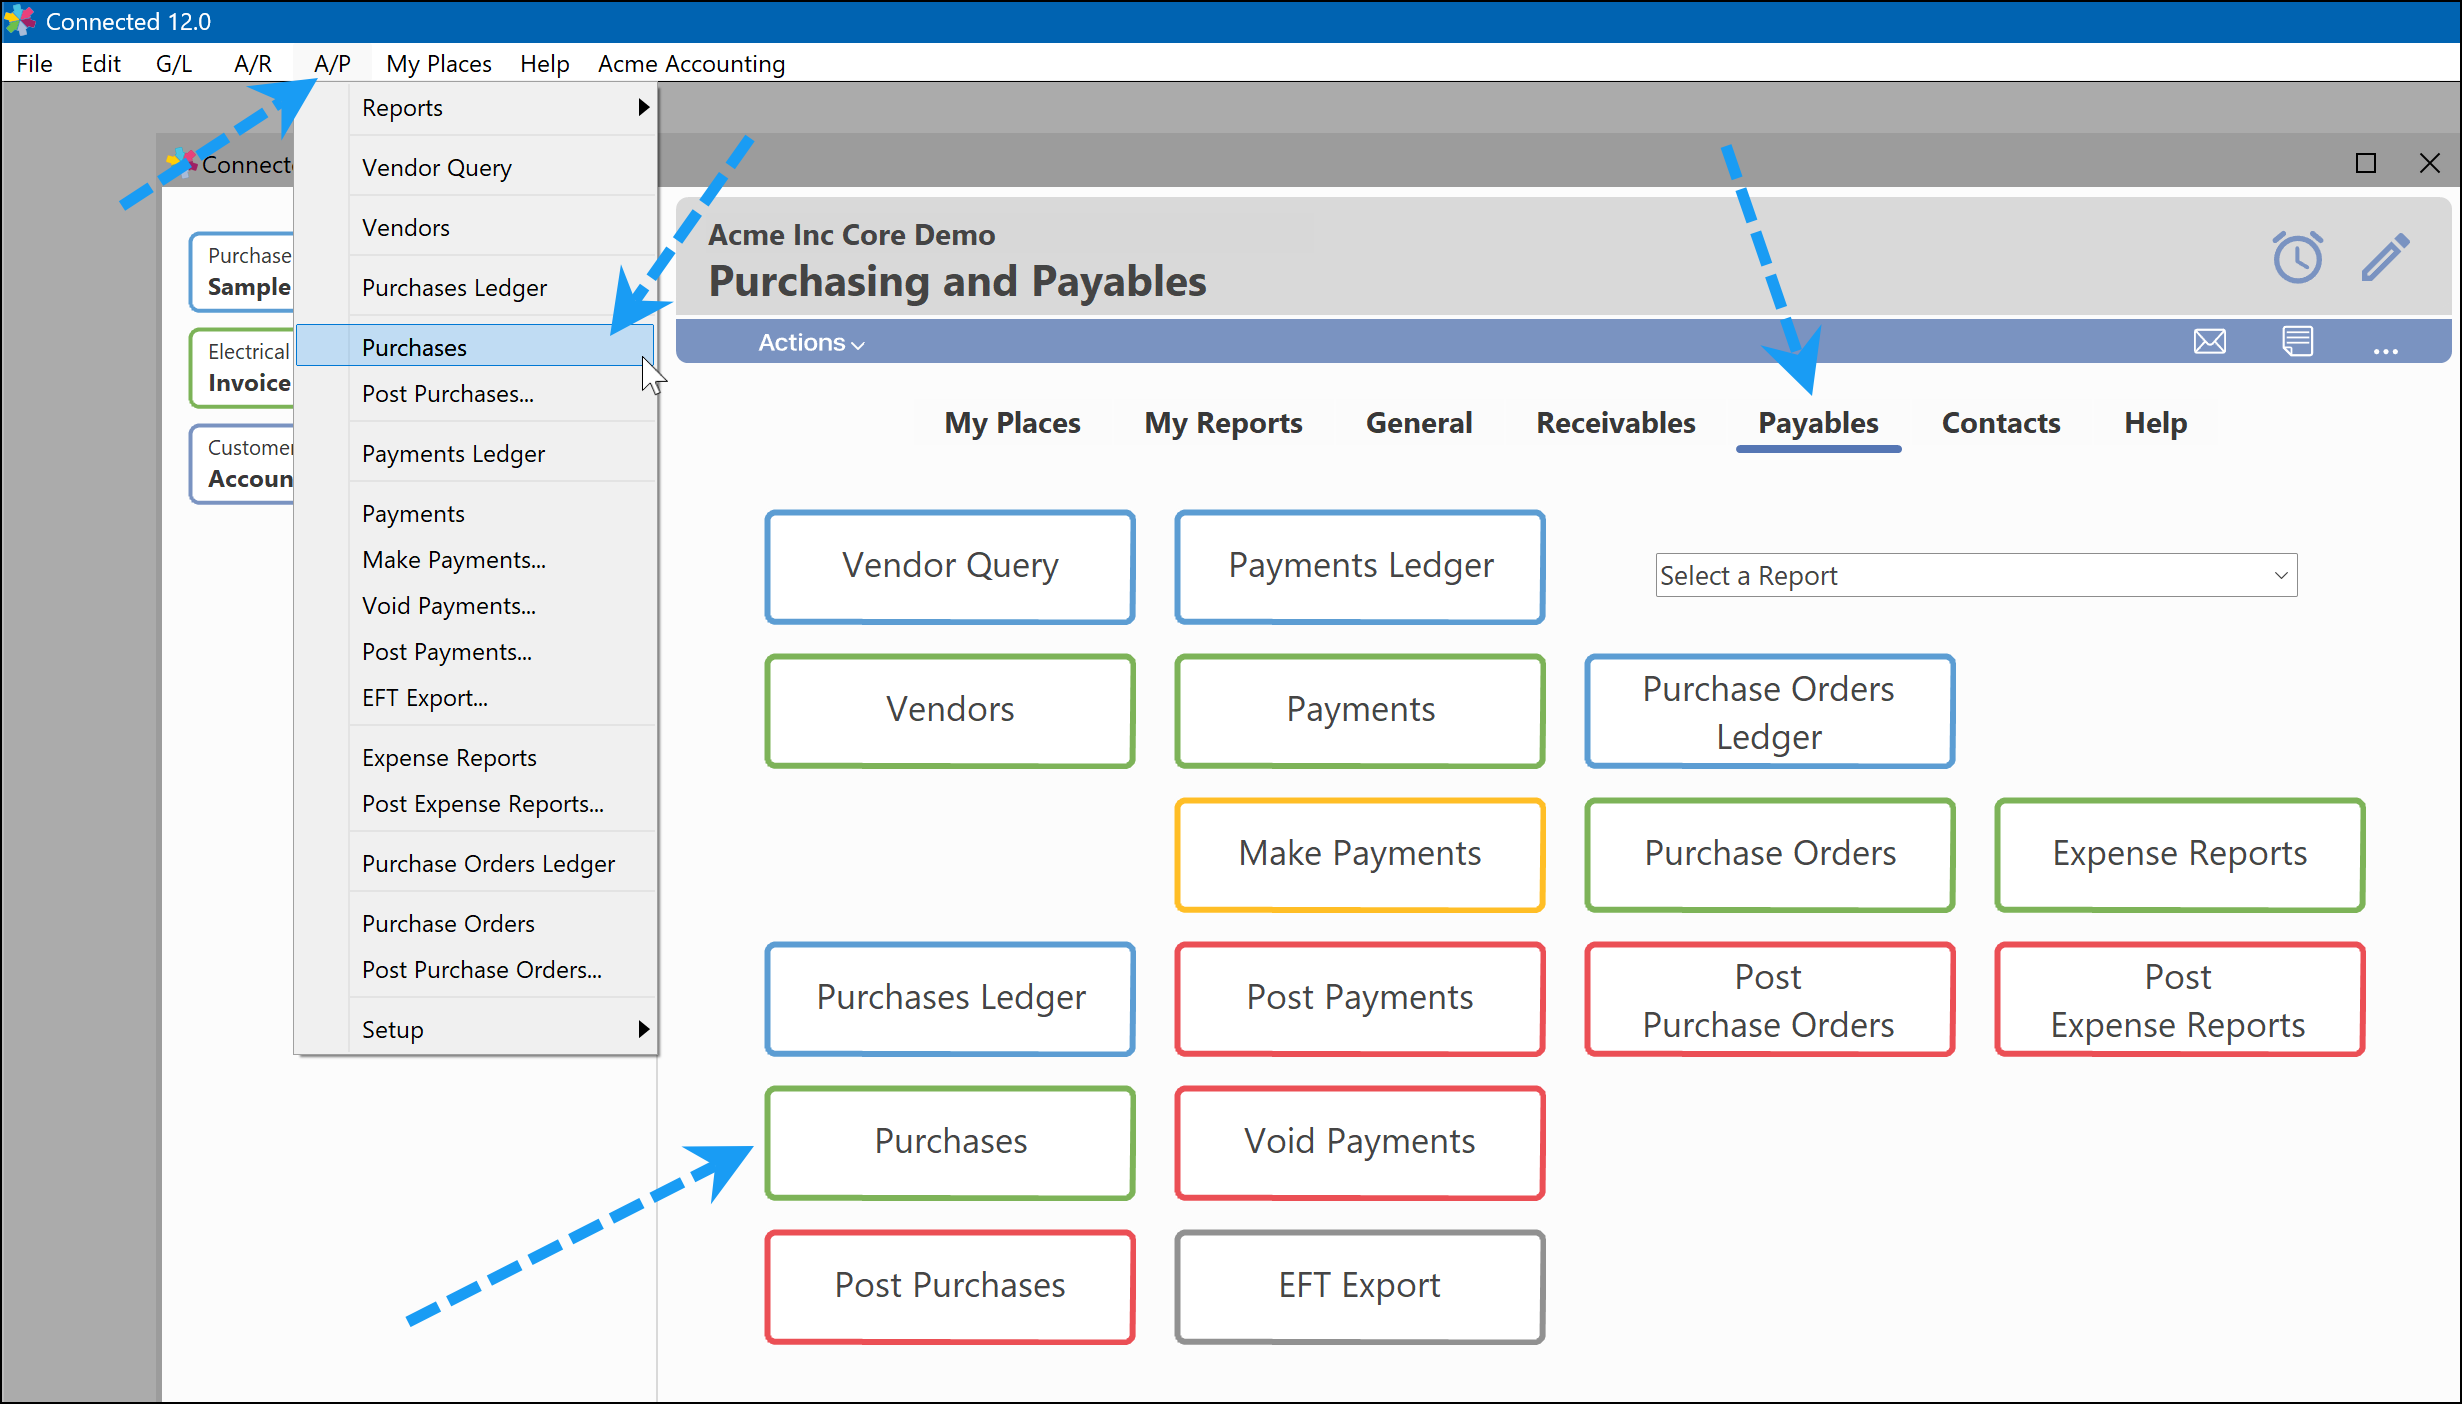
- Select Purchases from the A/P menu, or select Purchases from the CONNECTED Desktop window.
- Click Add.
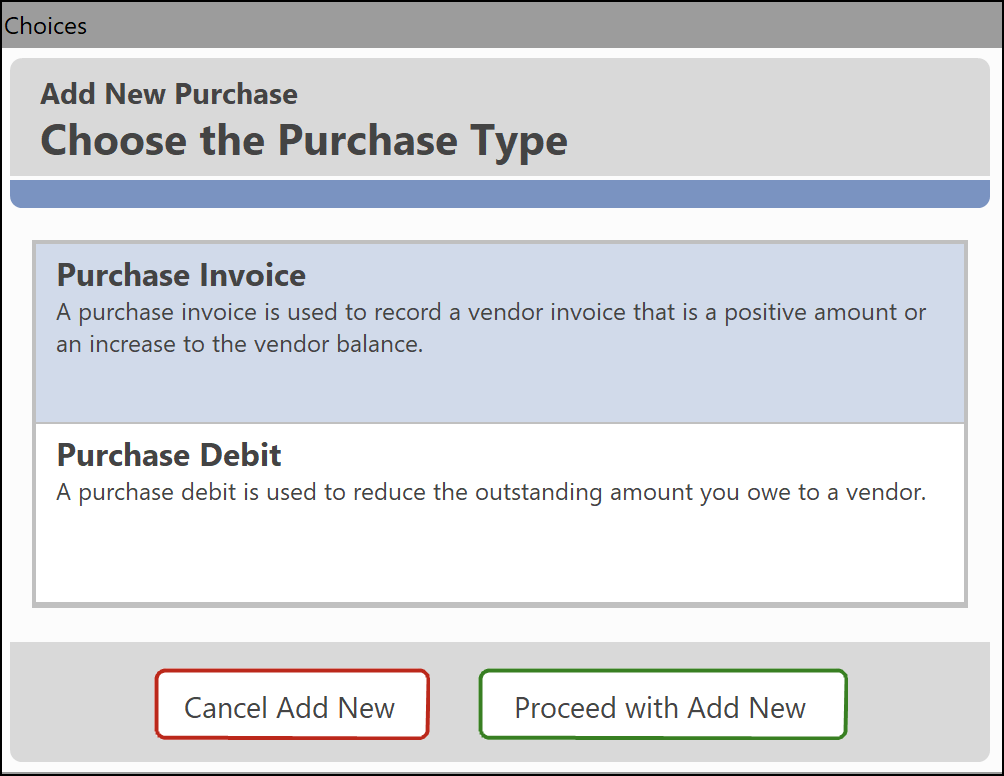
- From the choices window, select Purchase Invoice, then click the Proceed with Add New button. The other option, Purchase Debit, is explained later in this article.
- Enter the vendor code, or press TAB to select from the vendor list.
- Once the vendor is selected, the default terms appear and can be changed.
- Enter the vendor invoice number in the Invoice No field. This can be up to 20 alpha-numeric characters.
NOTE
CONNECTED verifies the invoice number to make sure it is unique for the vendor. This eliminates the mistake of entering an invoice twice for a vendor.
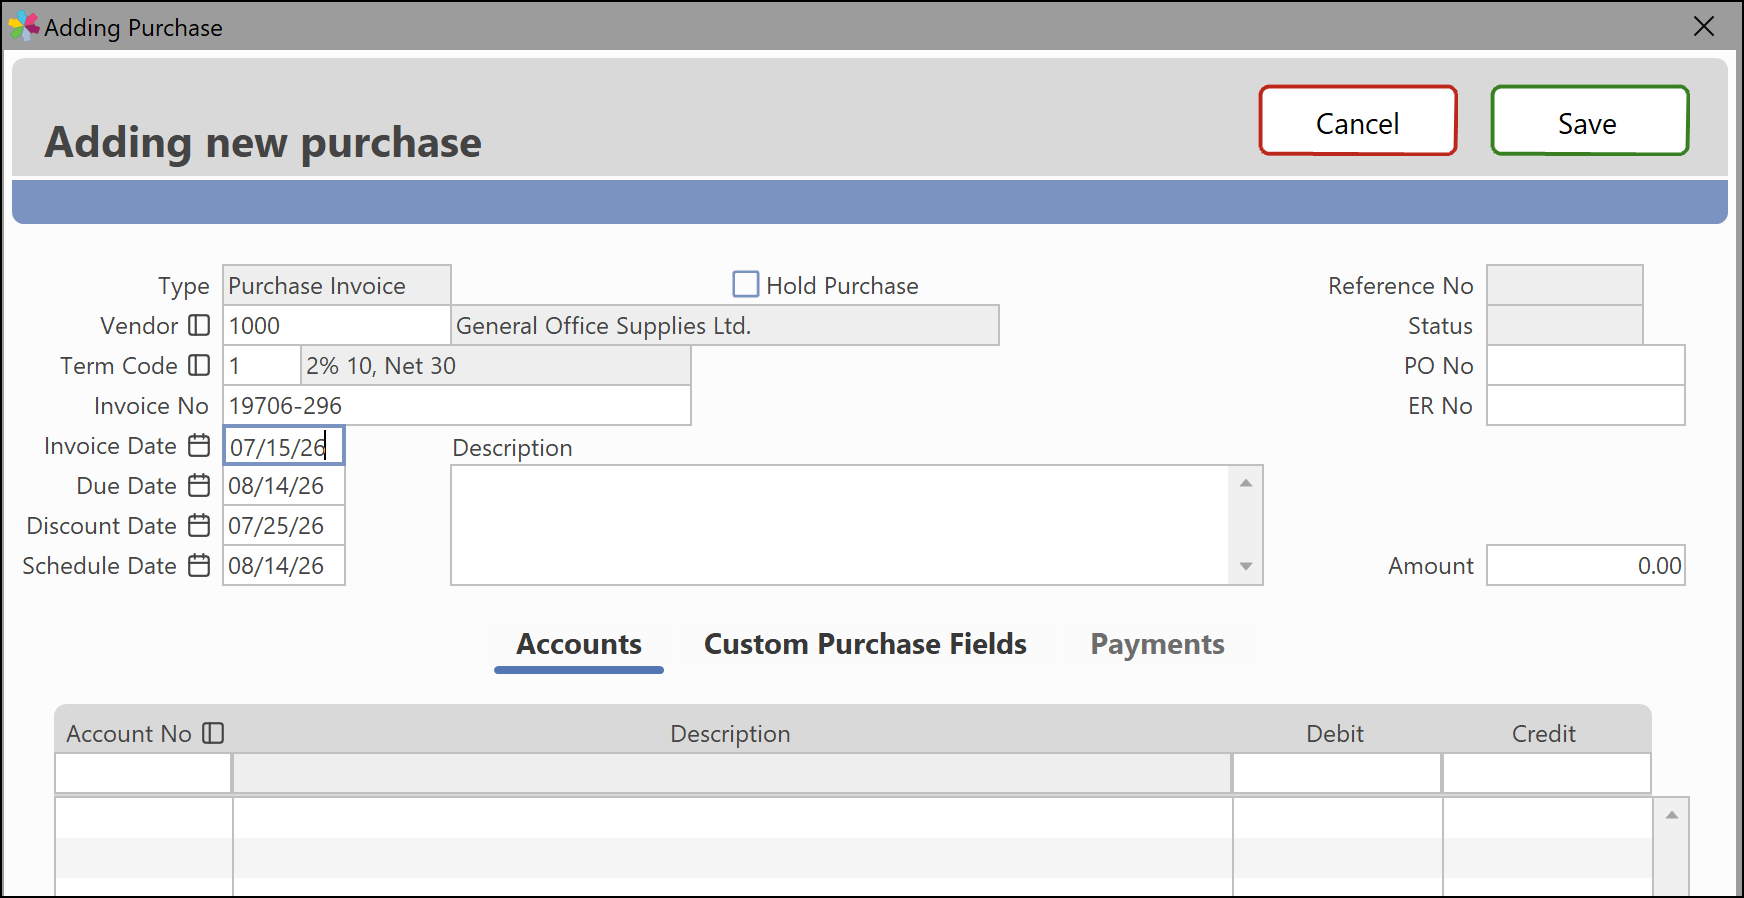
- Enter the Invoice Date. This is the date on the vendor's invoice and calculates the due date based on vendor terms. The Due Date, Discount Date (if applicable), and the Scheduled Date are automatically added, based on the vendor terms.
NOTE
When the Purchase is posted, the journal entry created in the general ledger will use the invoice date as the journal date.
- Enter the Description of the purchase. The field scrolls if the information exceeds the space on the screen.
TIP
To have a memo print for a specific entry on the check stub or Payment Advice (EFT/ACH payment), enter the word "Memo:" followed by a brief message. This message will appear on the check stub or Payment Advice form, beside the corresponding invoice. For example, entering "Memo: Annual membership fees" in the Description would print that memo on the check stub and/or Payment Advice form.
- Enter the PO No (number). If Purchase Orders are being used, the PO No is automatically entered when the vendor invoice is matched against the purchase order.
- Canadian users can enter GST/HST, while UK users enter the VAT amount, if applicable. This field is used to record the GST/HST or VAT inputs. This amount will automatically be allocated to the designated account defined on the A/P accounts window. If there is no GST/HST or VAT amount, simply press TAB at the field and leave it blank.
- Enter the Amount. This is the total amount of the purchase, which will include tax and shipping if applicable.
- Click Save to complete the entry.
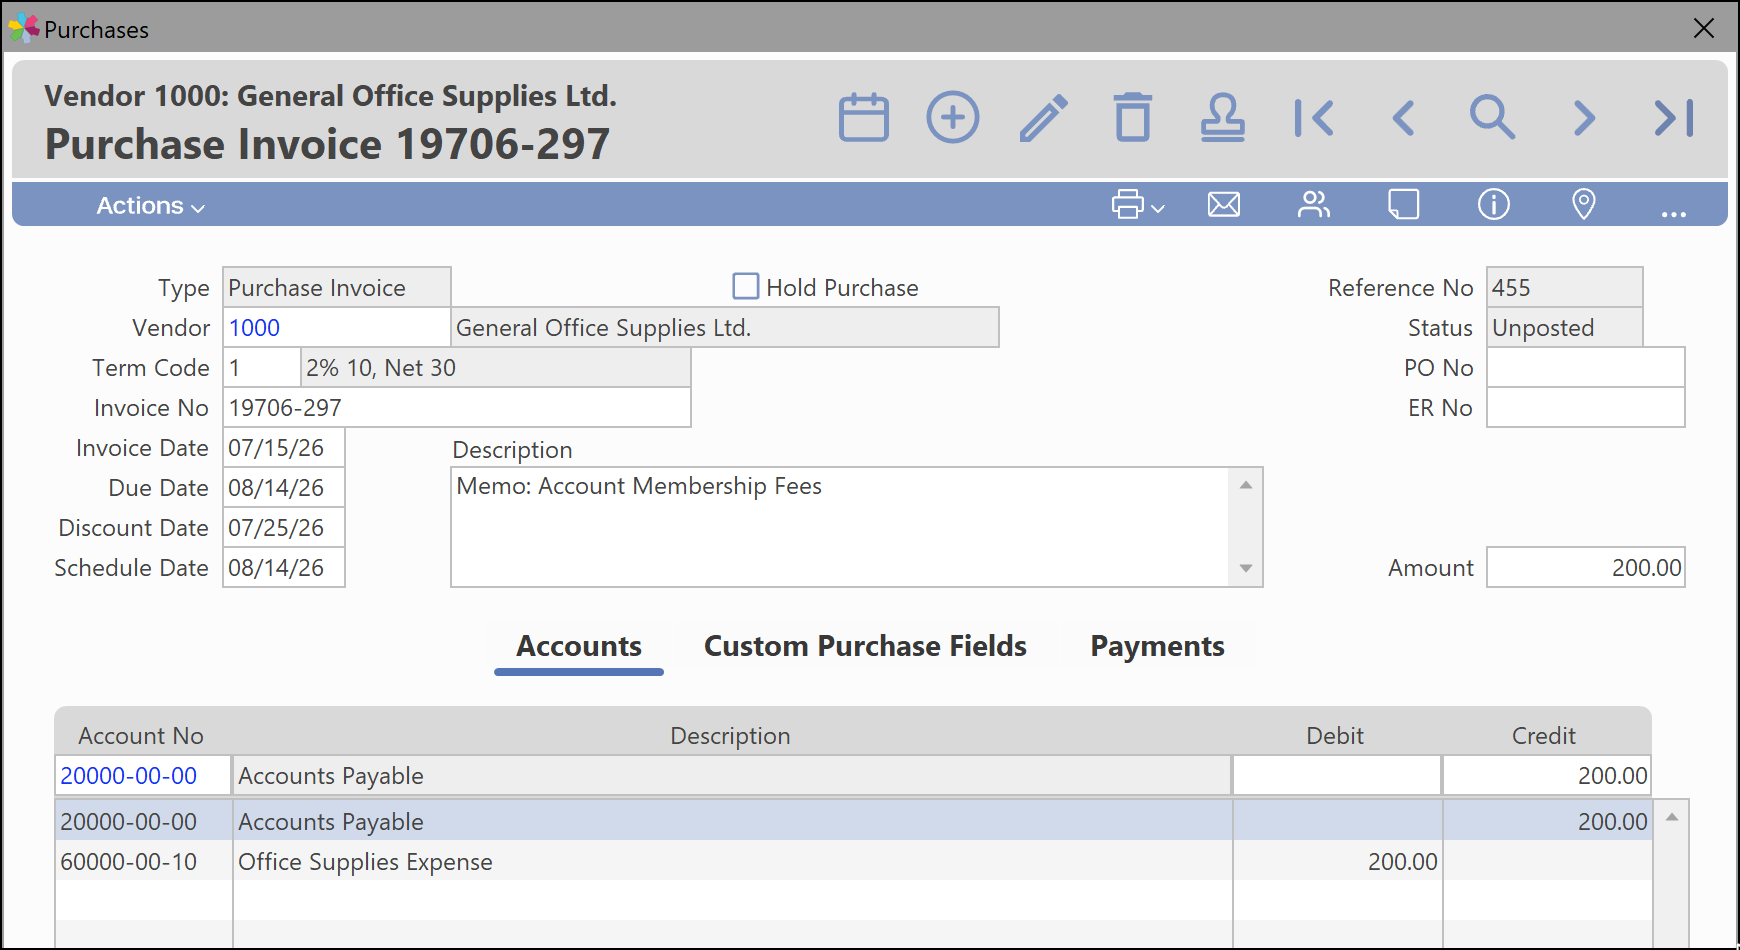
Once the purchase amount has been entered, it is automatically distributed to the default general ledger account for the vendor. The following screen shows a saved/unposted purchase.
The following section explains how to modify the general ledger accounts for an unposted Purchase.
2. Changing the Default Accounts on a Purchase
While entering a vendor bill, changing the default General Ledger accounts may be required. The most common change is for the expense account (debit side of the entry). A single bill can be distributed over several general ledger accounts.
To change the purchase G/L distribution:
- If adding a purchase, the accounts can be edited after the Amount is added and the TAB key is pressed. If the entry has already been saved, it can still be edited by clicking Modifyand editing the account(s).
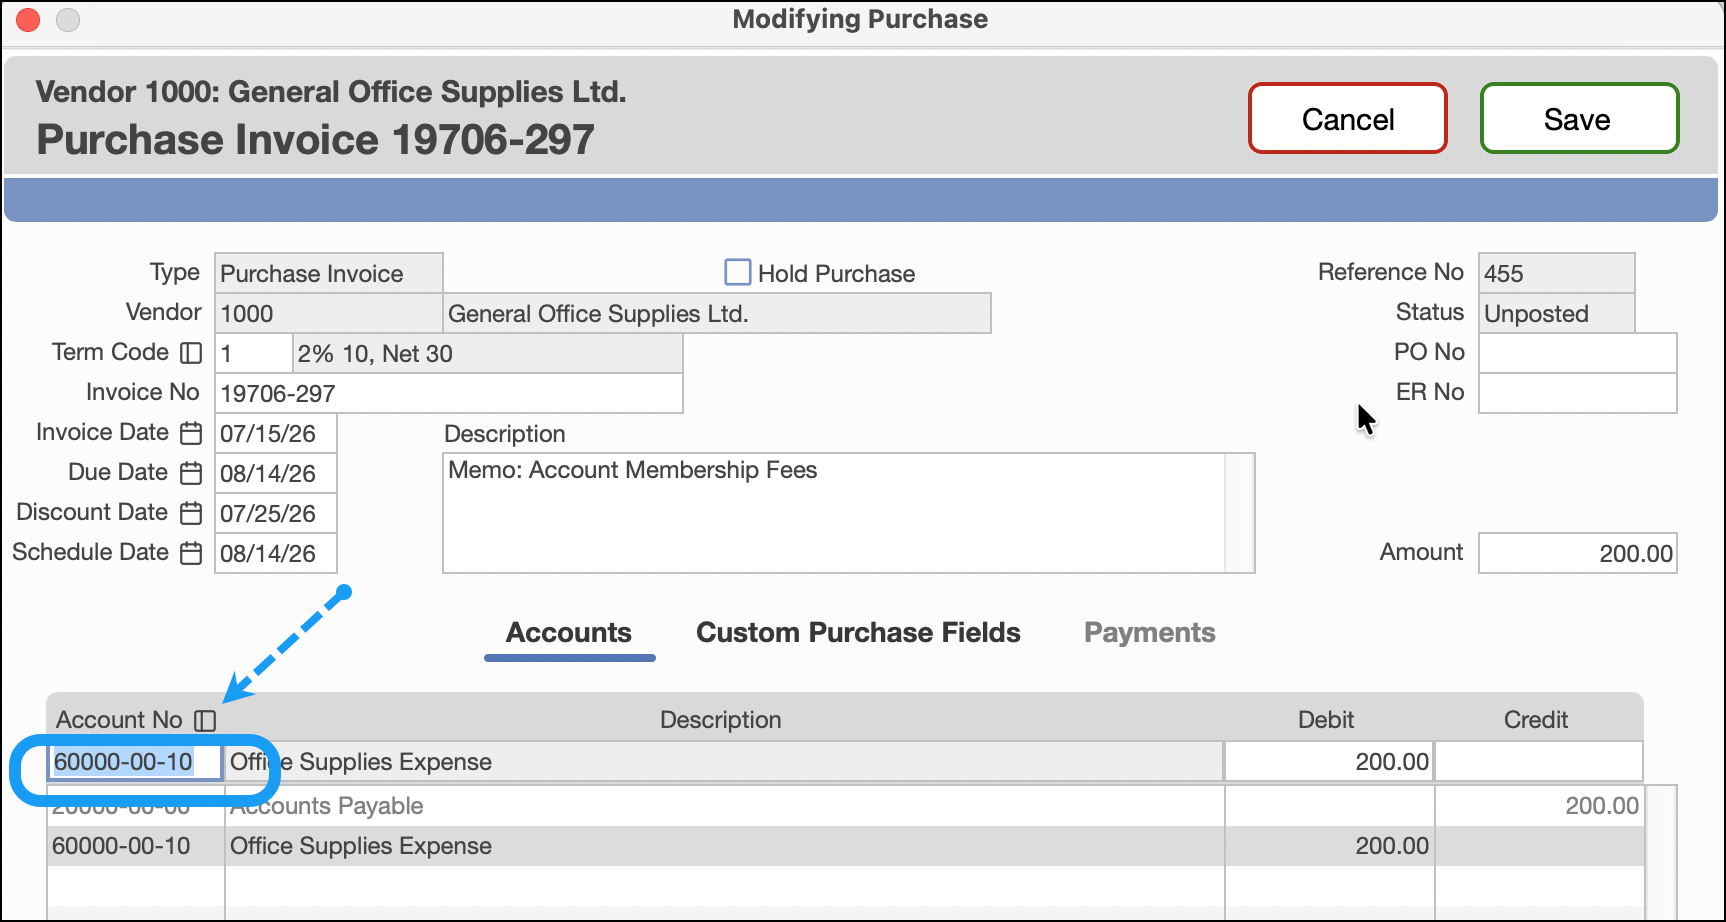
- Enter the new account number over the old one, or click the list icon and select. Press TAB and the description of the new account appears.
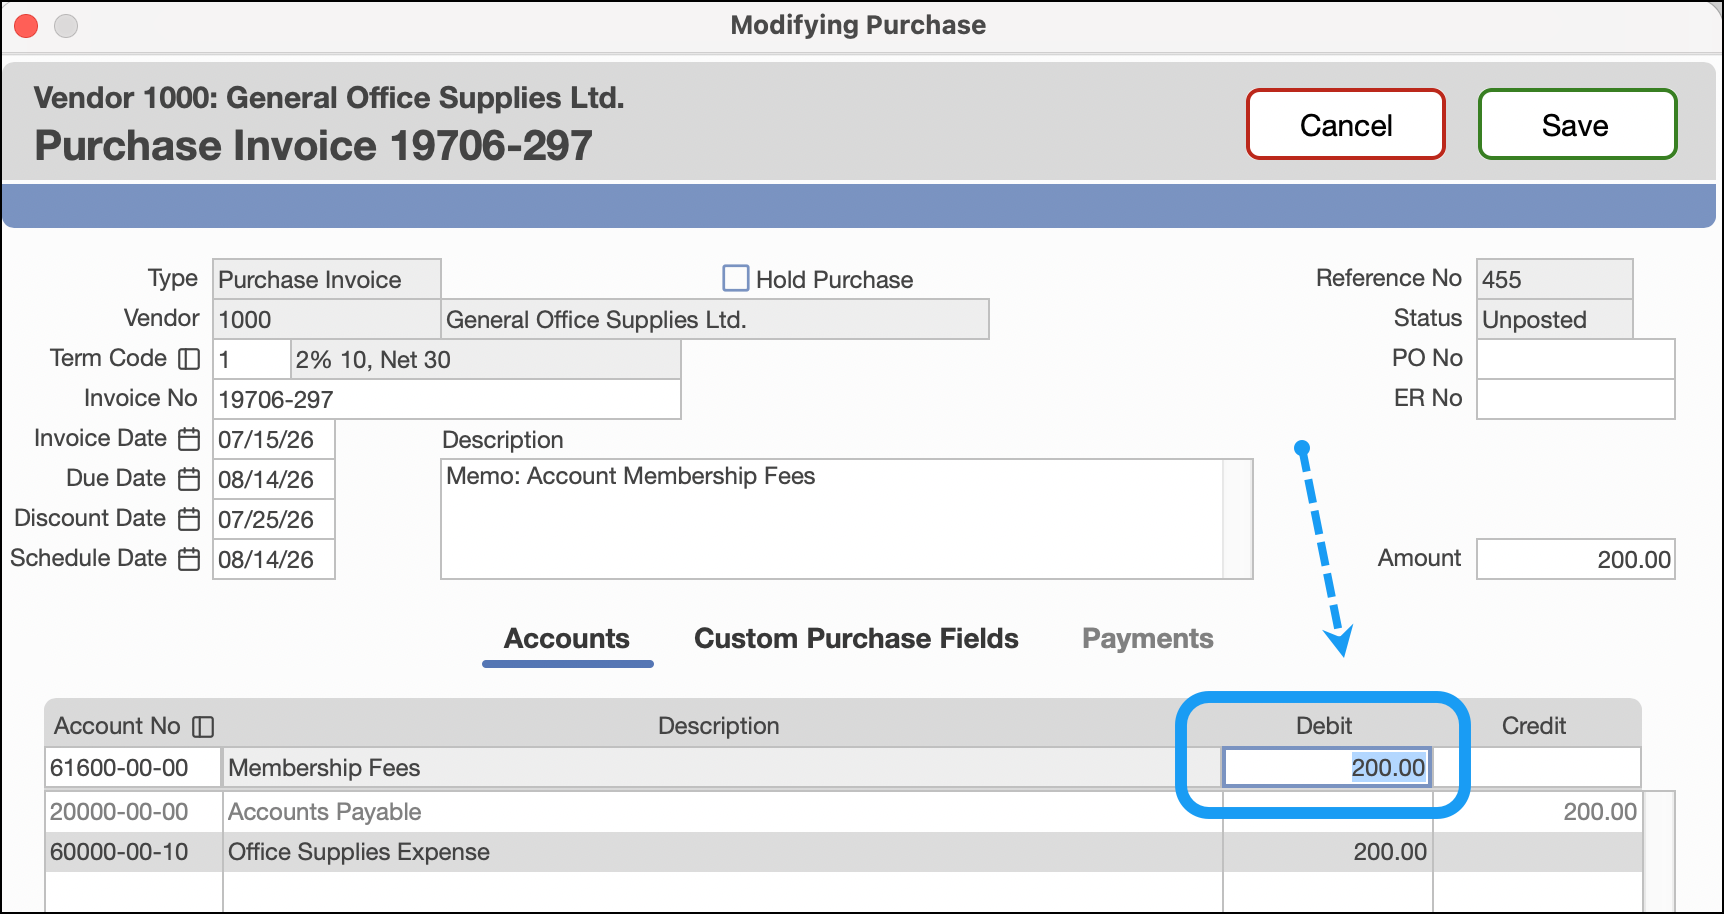
- The number in the debit field now becomes highlighted and can be changed.
NOTE
If the amount is changed, the purchase cannot be saved unless the Debits equal the Credits. Also, you cannot adjust the amount for the Accounts Payable account, which equals the total of the Purchase.
- Click Save to complete the changes.
3. Entering Purchase Debits (aka Credits)
A debit is used to reduce the outstanding amount you owe to a vendor. For example, if you returned some damaged goods to a vendor, they will issue a credit to your account. This is entered as a "debit" type entry in Purchases.
KB Article » Purchase Debit – Correcting or Reversing a Posted Purchase
4. Posting Purchases
Posting of Purchases can be done in two ways:
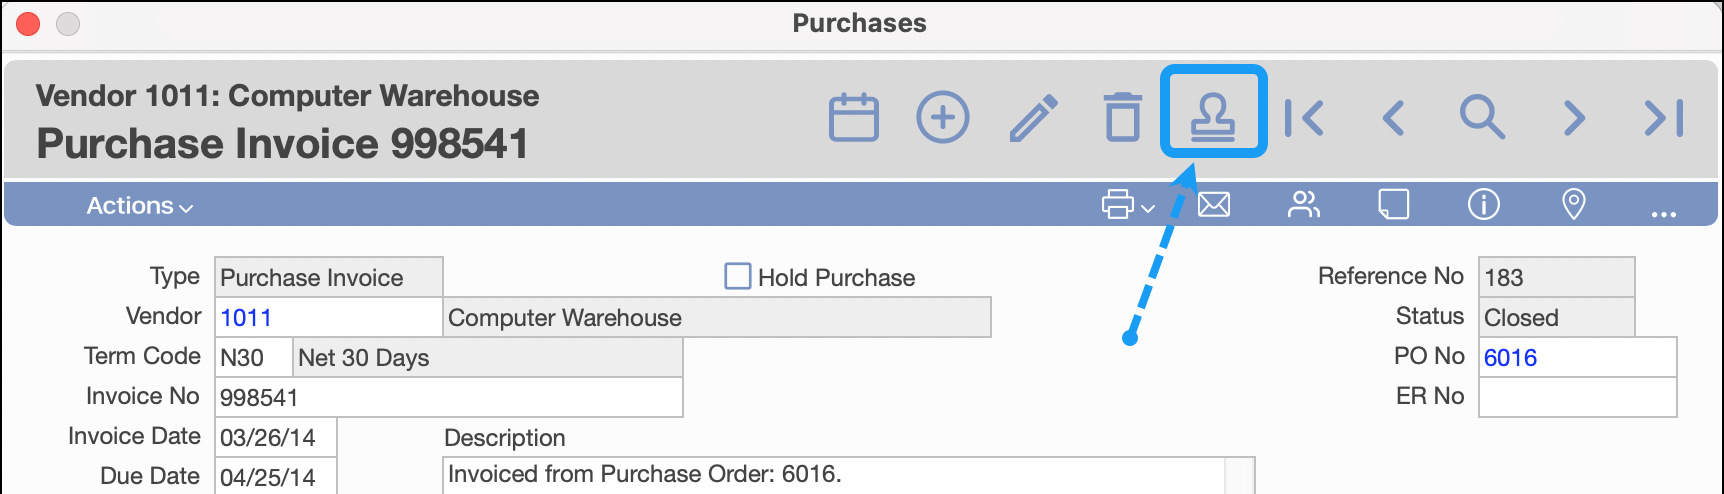
- Quick Post — posting a single purchase, one at a time.
- Group or Batch Post — posting multiple purchases at the same time.
TIP To view a list of unposted Purchases before posting, use the Purchases Ledger. KB Article » Using the Purchase Ledger |
Quick Post is located as shown in the screen below. This will post the single entry on the window.
4.1 Group or Batch Post Purchases
- Select Post Purchases from the Connected Desktop or the Accounts Payable menu.
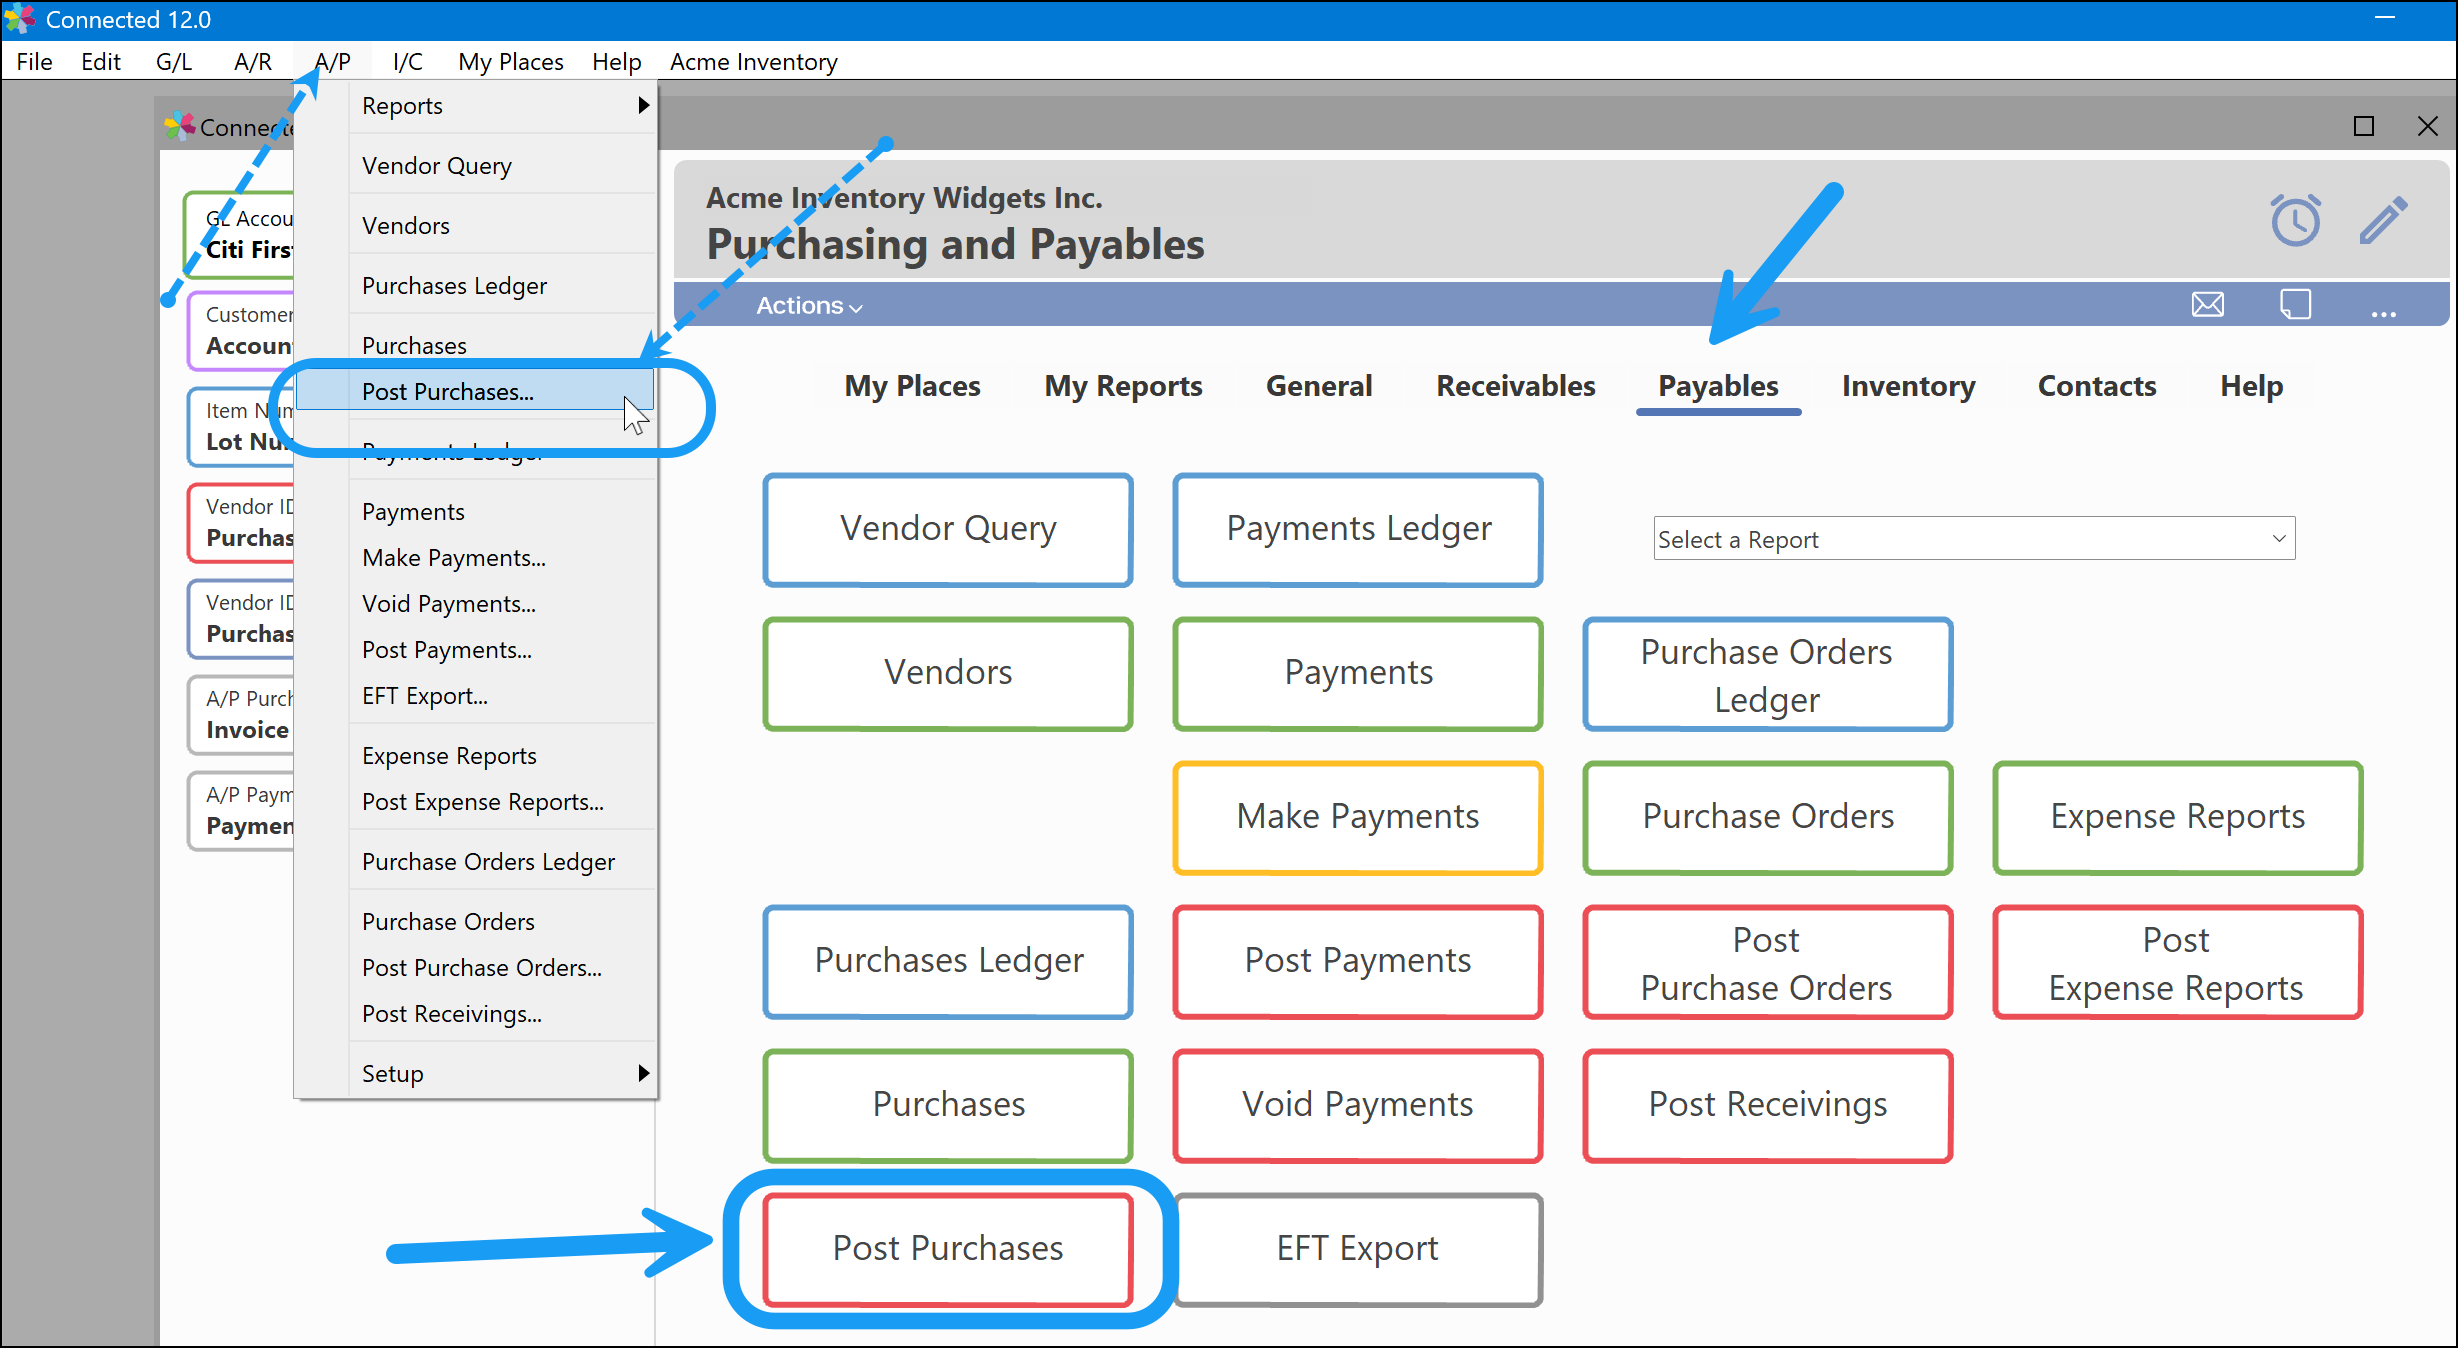
- Add any filters in the Post Purchases window. If Batch posting is enabled, a Batch No can be used to filter the posting.
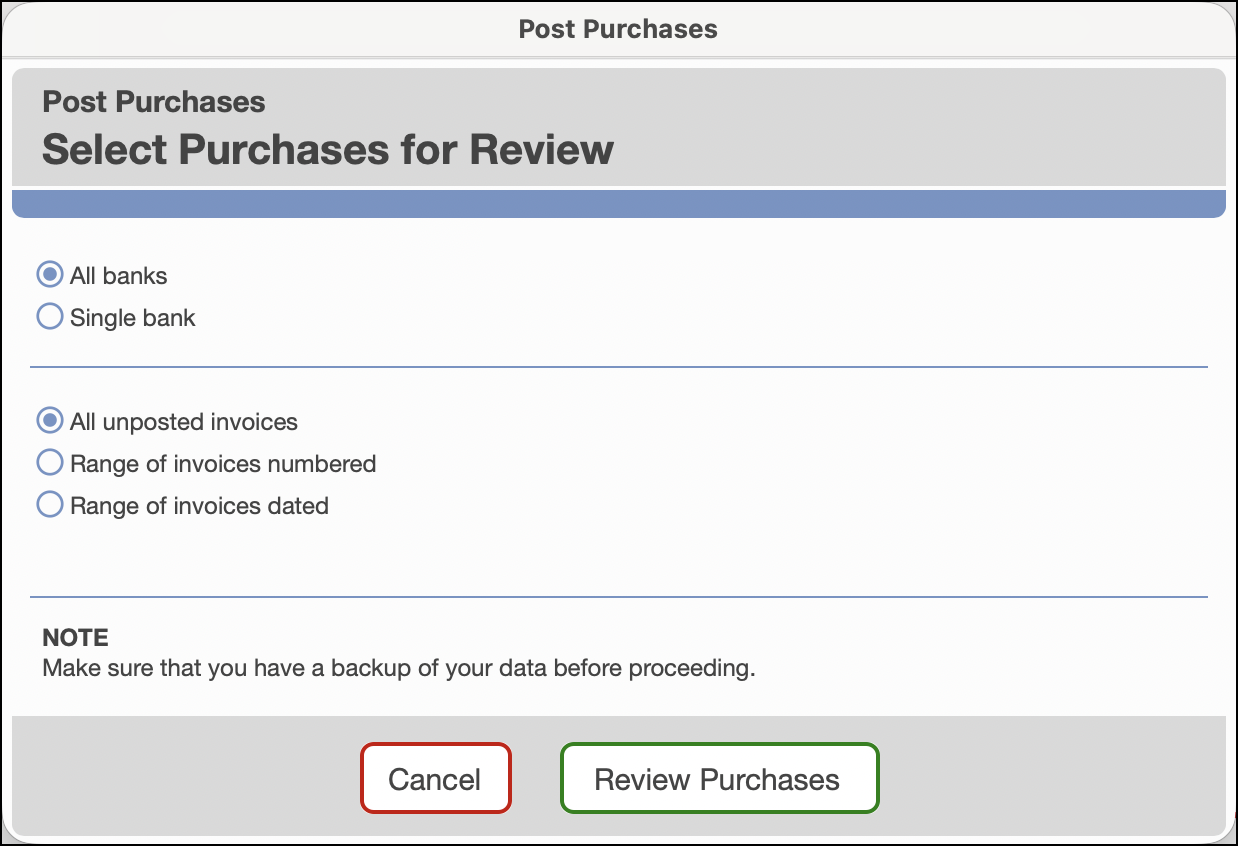
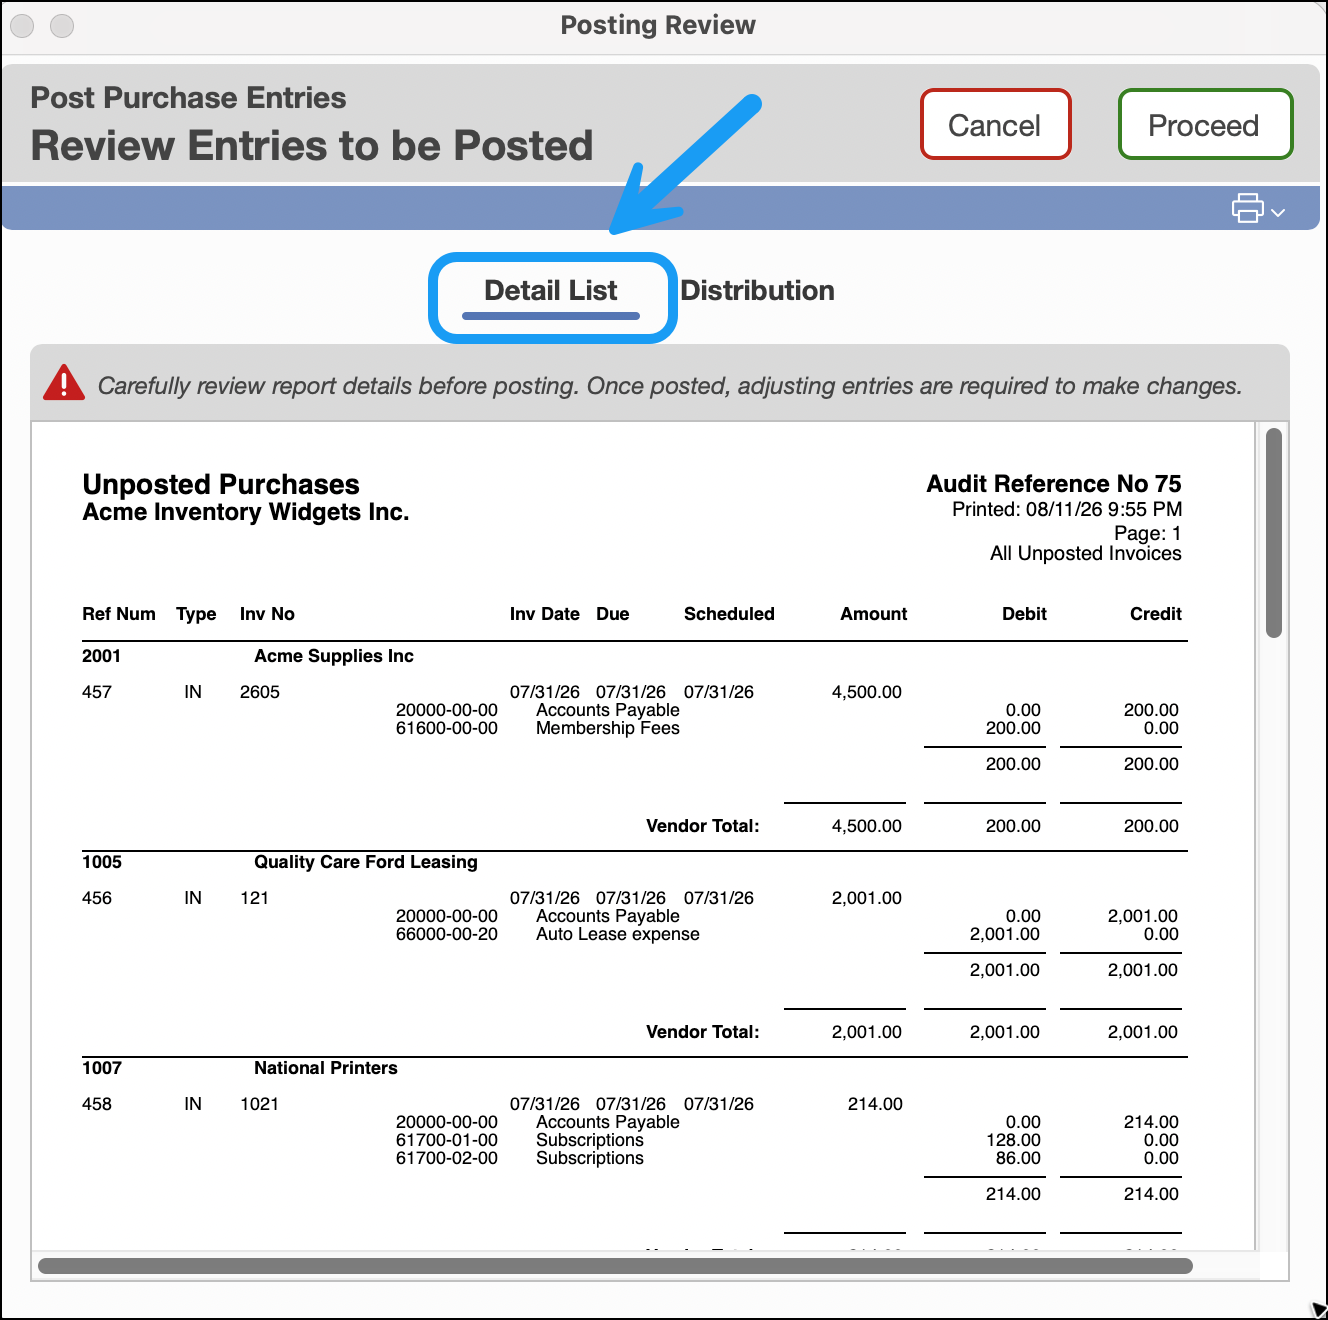
- Click Review Purchases to open the Posting Review screen, showing the Detail List of all entries.
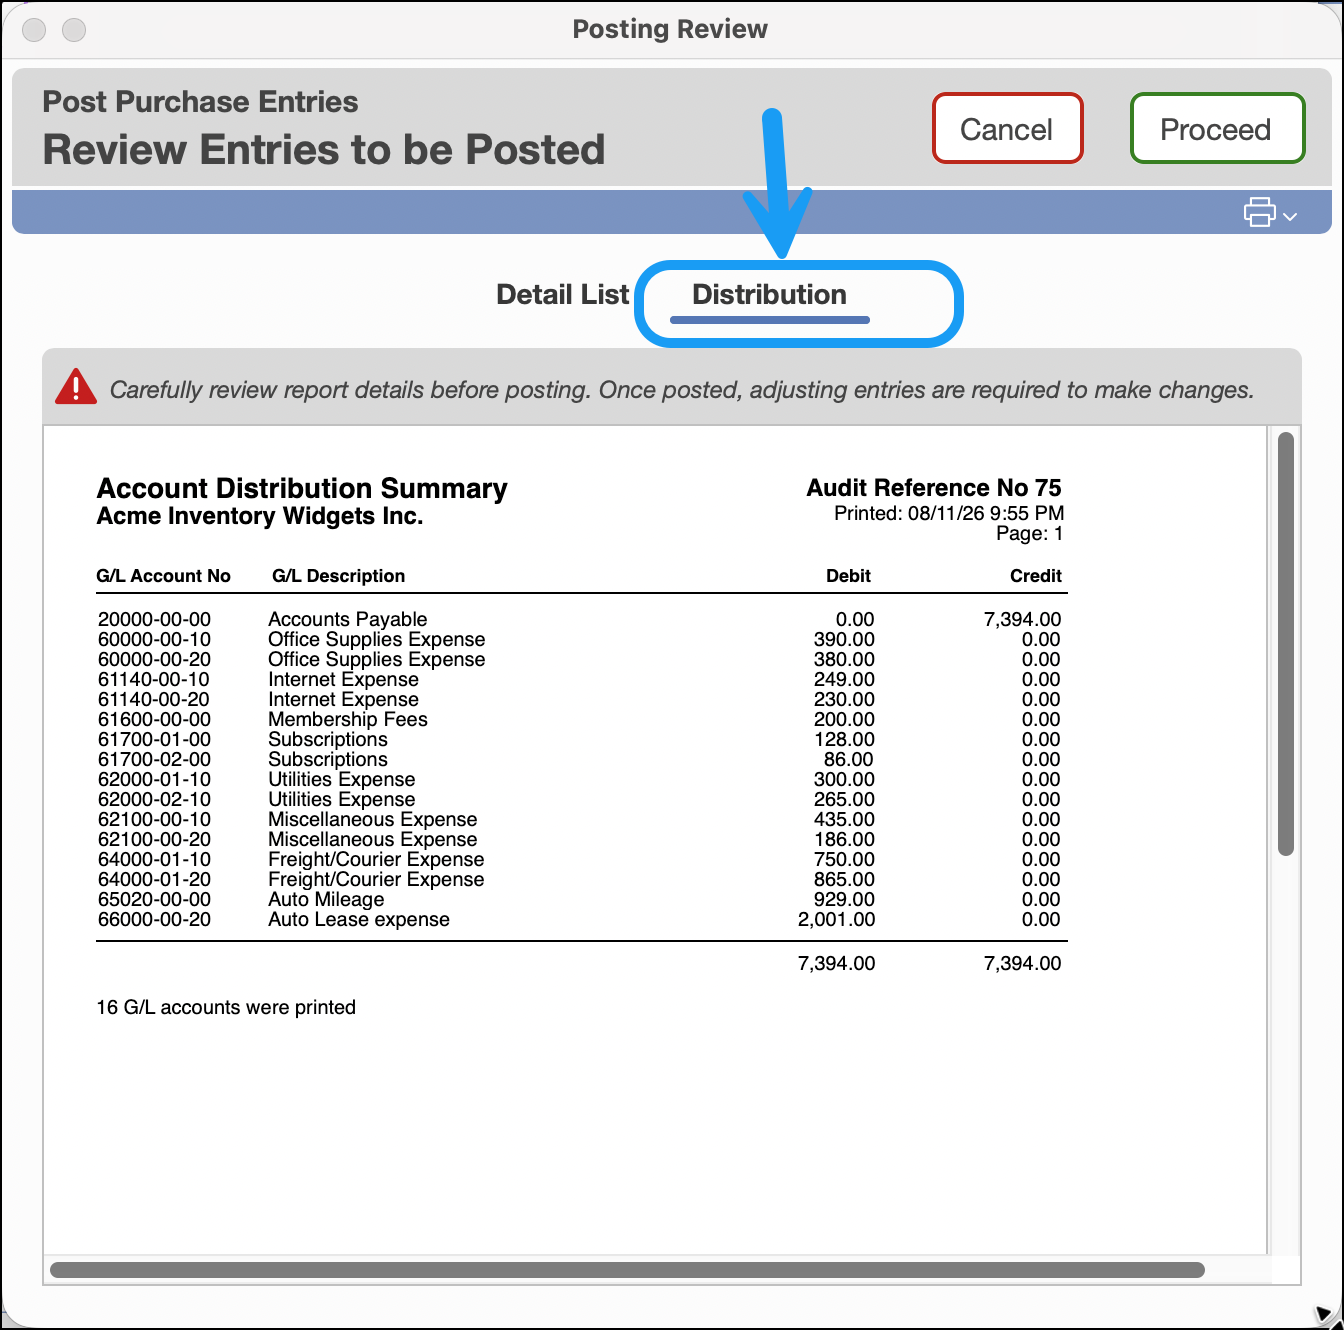
- To view the net General Ledger effect for the posting, click Distribution to show the net account distribution.
- Click Proceed to complete the posting, or Cancel to abort.
Was this article helpful?
That’s Great!
Thank you for your feedback
Sorry! We couldn't be helpful
Thank you for your feedback
Feedback sent
We appreciate your effort and will try to fix the article