Journal entries are the result of many of the operations in Connected. They can be created from customer invoices, vendor bills, payments, or by manually adding a journal entry.
This article covers the following topics:
Creating a General Journal Entry
General Journal entries can be created from the General Journal window, or automatically created form an entry in another module. For example, if you enter an invoice in the Accounts Receivable module, an entry is automatically created in the General Journal when the invoices are posted.
The General Journal window can be used to view journal entries created from transactions, like invoices, as well as add new entries. Examples of entries that would be added via a Journal Entry are bank charges or year end adjustments received from auditors.
To create a journal entry:
1) Select General Journal form the G/L menu or click General Journal from the Connected Desktop window. The following blank General Journal window will appear.

2) Click Add and specify the Journal Date. The date must be within an open period.
3) Enter the Description for the transaction. This field is scrollable, and you can enter up to 1000 characters.
4) Enter the Account No (number) and press TAB. The description for the account appears automatically. If you cannot remember the account number you want, press TAB or click the list icon and a popup list of accounts appears to select from.
5) Edit the default line Account Description, if enabled. To edit the line account description "Modify General Journal Line Description" needs to be selected in the G/L Defaults setup window.
6) If the amount to be entered is a debit, enter it in the Debit field. If the amount to be entered is a credit, press TAB and enter it in the Credit field. Once the amount is entered, a new line will begin and automatically balance the entry after another account is selected. This is shown in the following screen.

7) Repeat steps 5-6 to create the balancing entry. Press ENTER or click save to finish the entry.
If an entry is unbalanced the following message will appear when trying to save: Unbalanced or empty journal entry. The journal cannot be saved if it is unbalanced.
Editing Journal Entries
Deleting a Line
When entering or editing a journal entry, you may want to delete a single journal line.
To delete the line:
1) Select Modify, then Select the line entry you want to delete by clicking on it.

2) Select Delete List Item from the Edit menu or click the Delete Line icon form the bottom left of the screen. The message appears: "FINAL WARNING" Are you sure you want to delete this line item for G/L account 00000-00-00?
3) Select Yes to delete the line entry, No if you do not want to delete.
4) Press ENTER or Save to complete the changes
Adding a Journal Line
When entering or editing a journal entry, you may want to add a single journal line.
To add the line:
1) Find the journal entry and select Modify.
2) Select Add List Item from the Edit menu pr click the Add Line icon from the bottom left pf the General Journal screen. A new blank line will be started.

Modifying a Journal Entry
To modify a saved/unposted journal entry:
1) Find the journal entry to change and click Modify.
2) The first line of the entry is highlighted by default. Select the line to modify by clicking on it. TAB over to the field and type the correct information over it. Press TAB to accept this information.
3) Press ENTER or click Save to complete the modification.
Deleting or Reversing Journal Entry
A journal entry can only be deleted if it has not been posted. Simply find the unposted entry and click Delete.
If an entry has already been posted it cannot be deleted. To correct an erroneous posted journal entry, make another general entry (adjusting entry) to reverse the error or select "Create Reversing Entry" from the Actions menu, as shown in the following screen. Pay close attention to the date and ensure it is the correct date for what is being adjusted.

Please Note: If a reversing entry has been created, it still needs to be posted.
Posting a Journal Entry
Posting a journal entry can either be done using the Quick Post in the journal entries window or by selecting "Post Journal Entries" from the Connected Desktop.

Using the Quick Post, the following screen will appear with the following warning:

The entry can be printed, posting cancelled, or posting can proceed, by clicking the Proceed button.
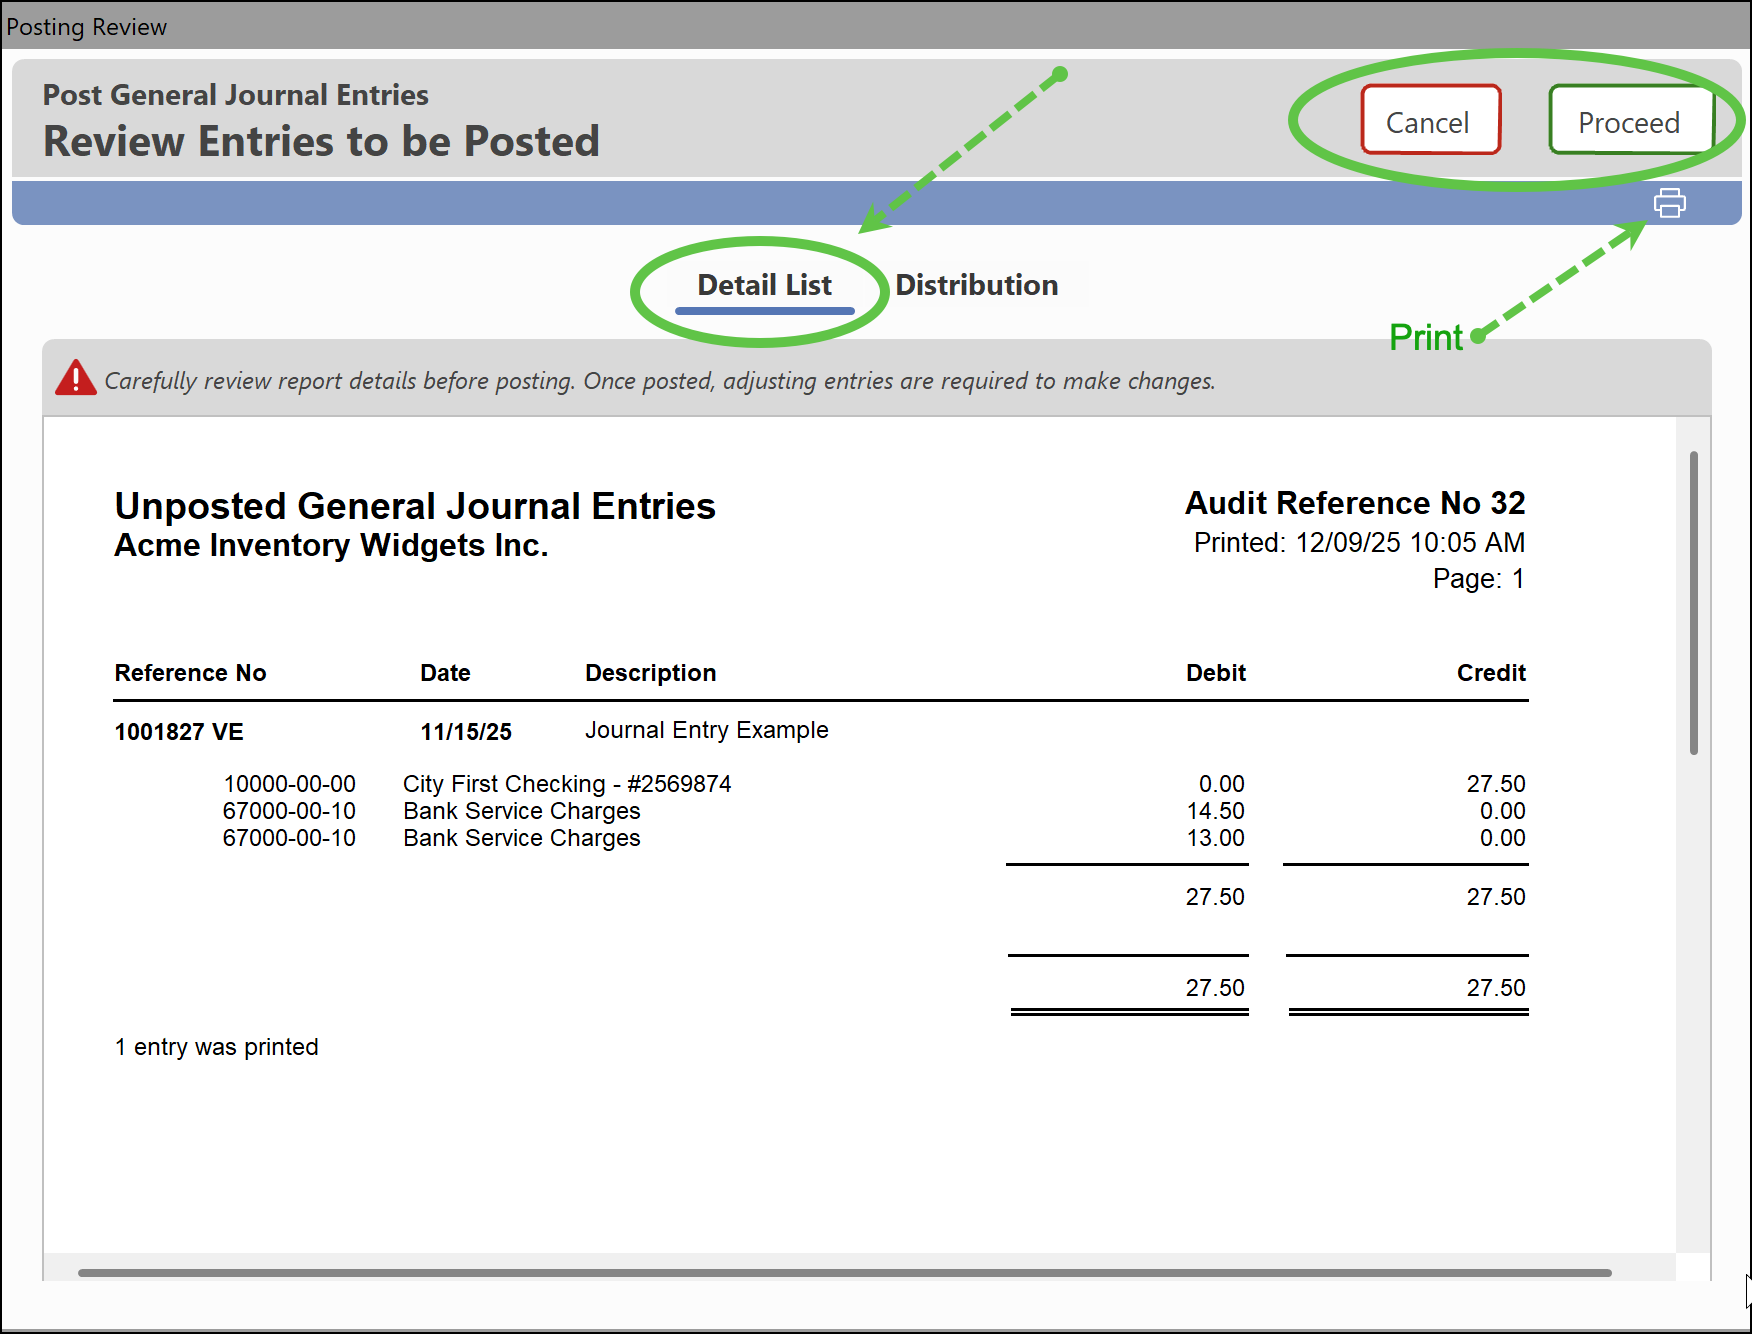
Click the Distribution tab to view the net report of the account to be affected during the posting. From this tab entry can be printed, posting cancelled, or posting can proceed, by clicking the Proceed button.
Was this article helpful?
That’s Great!
Thank you for your feedback
Sorry! We couldn't be helpful
Thank you for your feedback
Feedback sent
We appreciate your effort and will try to fix the article