Knowledge Base · General Ledger and Financials
Applies to: All Supported Versions | Platform: macOS, Windows, Connected on Demand
ARTICLE CONTENTS
1. Overview
The following describes how to add a new general ledger account.
2. Adding a General Ledger Account
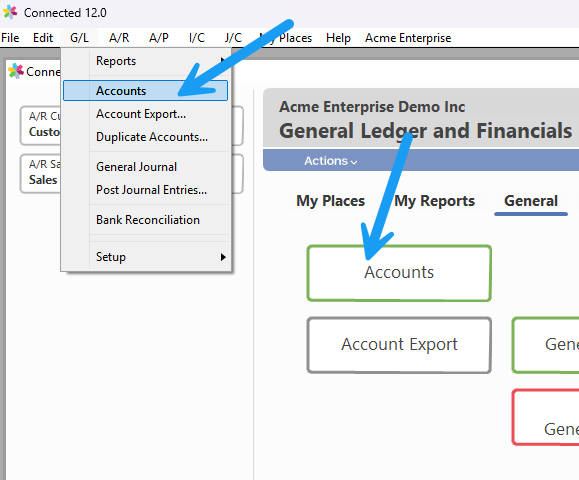
- Select Accounts from the G/L menu or select Accounts from the Connected Desktop, as shown in the following screen.
- The following blank Accounts window will appear. The default tab will be "Activity Ledger".
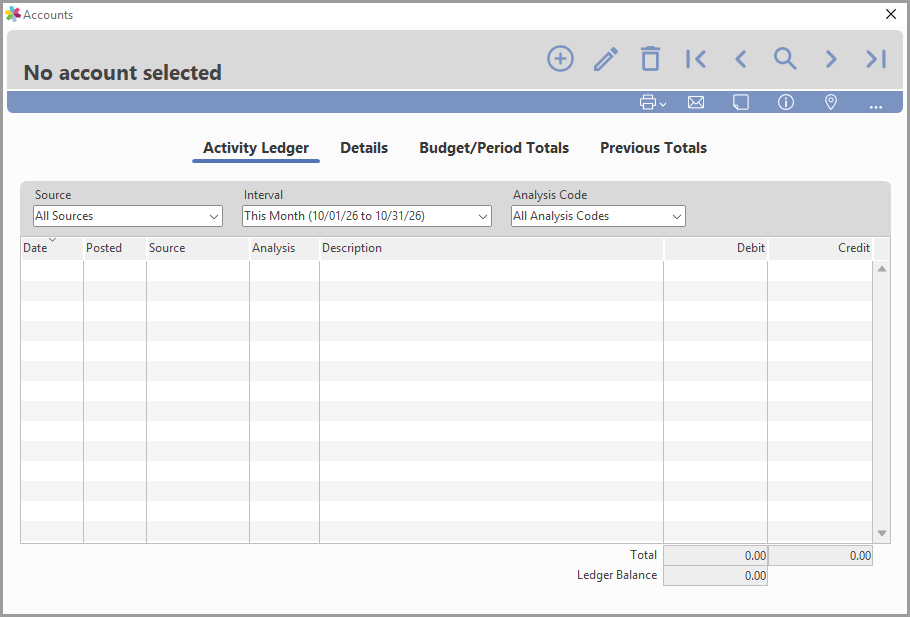
- Click Add. The Accounts window will automatically shift to the "Details" tab as shown in the following screen.
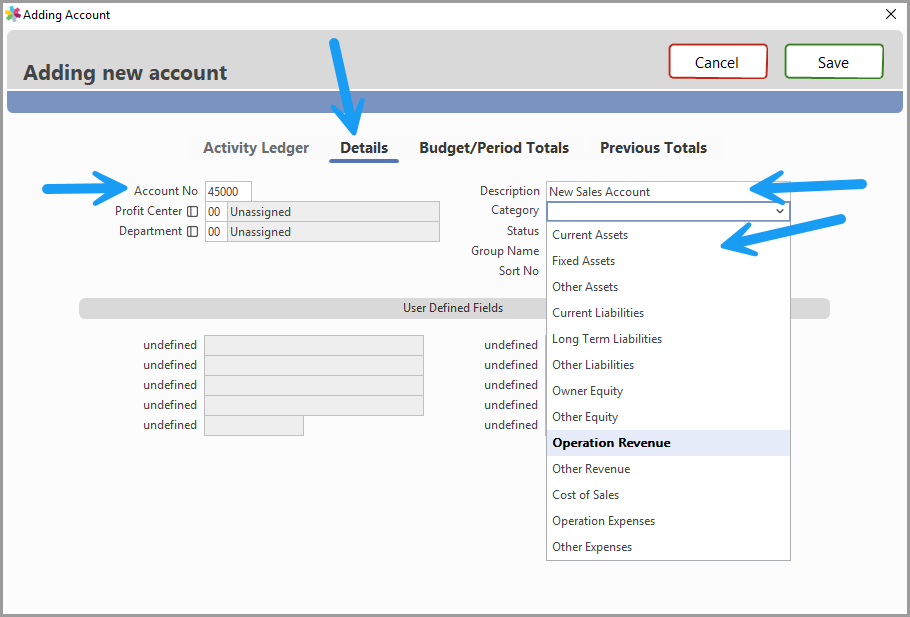
- Enter a five digit Account No (number).
- If enabled, enter a two digit Profit Center code. If the field is left blank, press TAB and a list will appear to select from.
- If enabled, enter a two digit Department code. If the field is left blank, press TAB and a list will appear to select from.
- Enter the Description (aka name) of the account. This description will appear on all reports and pop-up lists.
- Select the Category from the pull-down menu. For example, a Sales account may use "Operation Revenue" as the category.
- Press ENTER or click Save to complete the new account entry.
3. Related Articles
Was this article helpful?
That’s Great!
Thank you for your feedback
Sorry! We couldn't be helpful
Thank you for your feedback
Feedback sent
We appreciate your effort and will try to fix the article