Knowledge Base · Reporting & Ledgers
Applies to: Connected 12.X | Platform: macOS, Windows, Connected on Demand | Prepared: August 2026
ARTICLE CONTENTS
1. What Are Connected Views?
With Connected Views, users can add, save, edit, and load different views. For example, when looking at the Sales Ledger, a user might have views saved for Unposted Invoices, Unpaid Invoices, and/or All Invoices.
Connected Views allows up to 99 different custom views to be saved per supported window, per user. This feature is available in all Ledger and Query windows:
- Sales Ledger
- Sales Quote Ledger
- Sales Order Ledger
- Customer Query
- Receipts Ledger
- Vendor Query
- Purchase Ledger
- Payments Ledger
- Purchase Order Ledger
- Job Query
- Inventory Item Query
- Work Orders Ledger
1.1 How Do Connected Views Work?
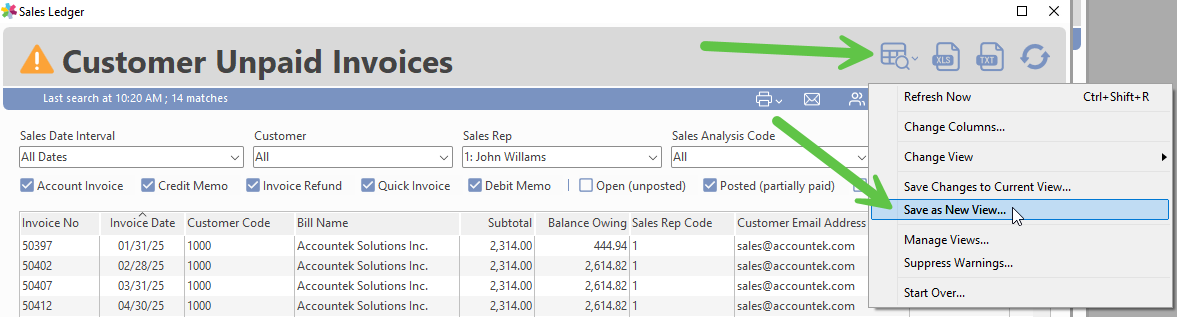
When editing the display columns and/or filters in a supported window, a user is alerted that the view has changed, as shown below by an exclamation mark to the left of the view name.

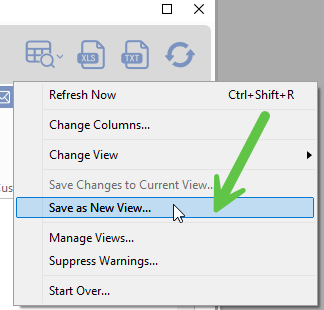
Views are saved using the Action Menu → Save as New View option.
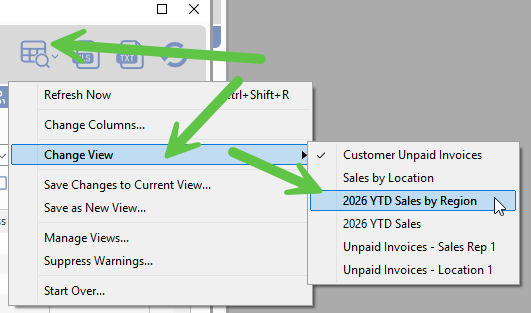
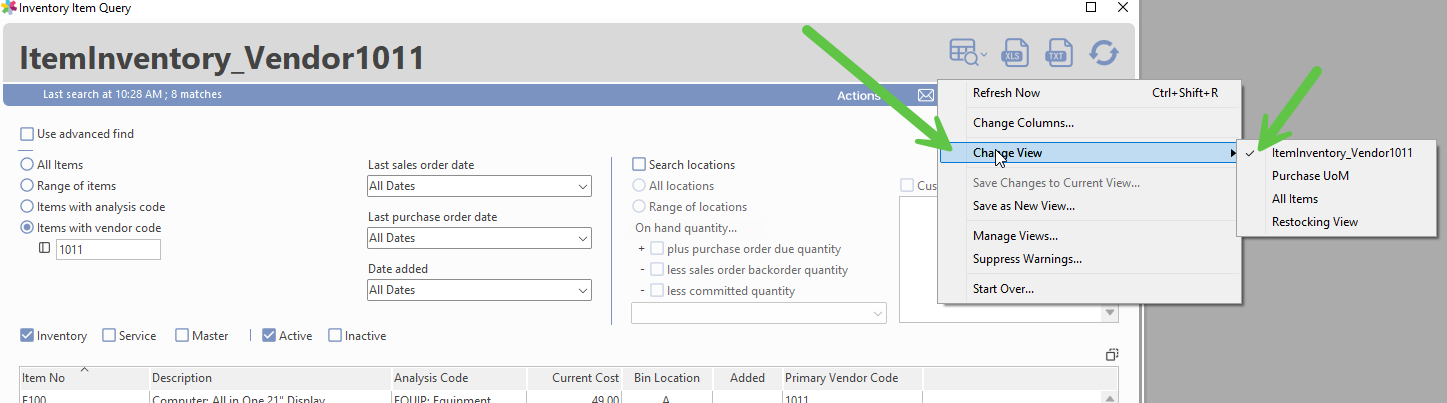
A user can switch between saved views using Action Menu → Change View.
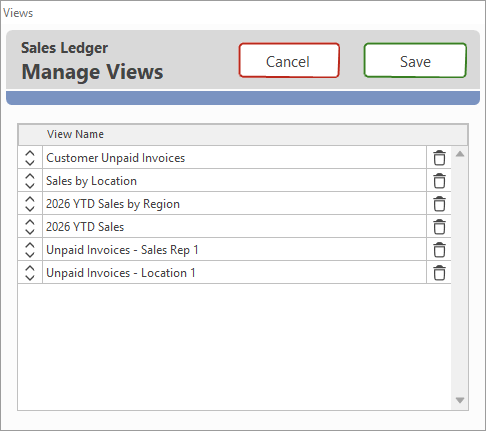
All saved views in a specific ledger can be managed using the Manage Views action. Views can be reordered, renamed, and/or deleted.
1.2 Connected Views Example - Inventory Item Query
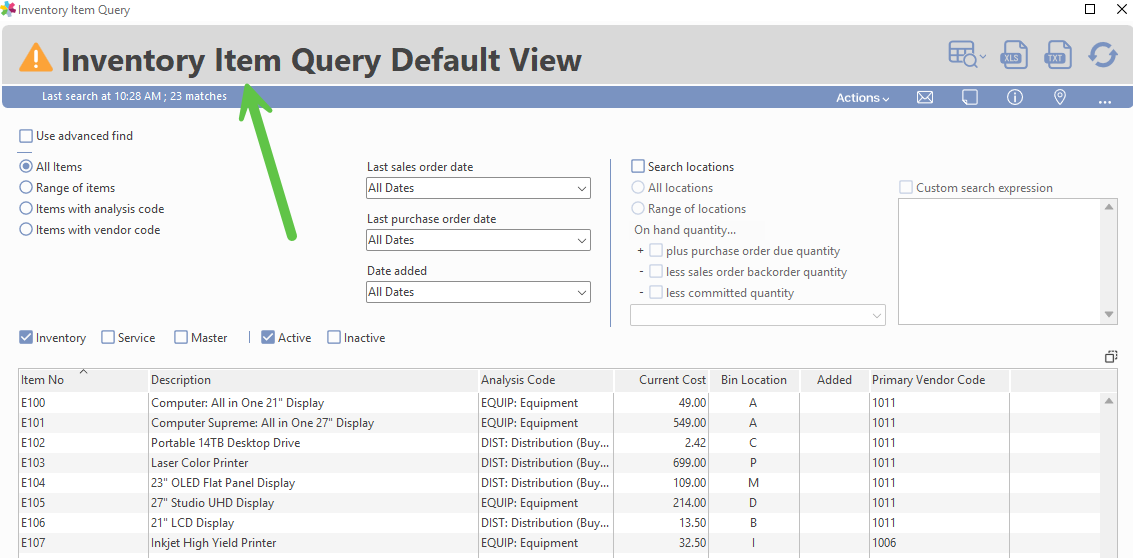
An example of how Connected Views can be used is to filter the Inventory Item Query view to have saved views for each vendor.
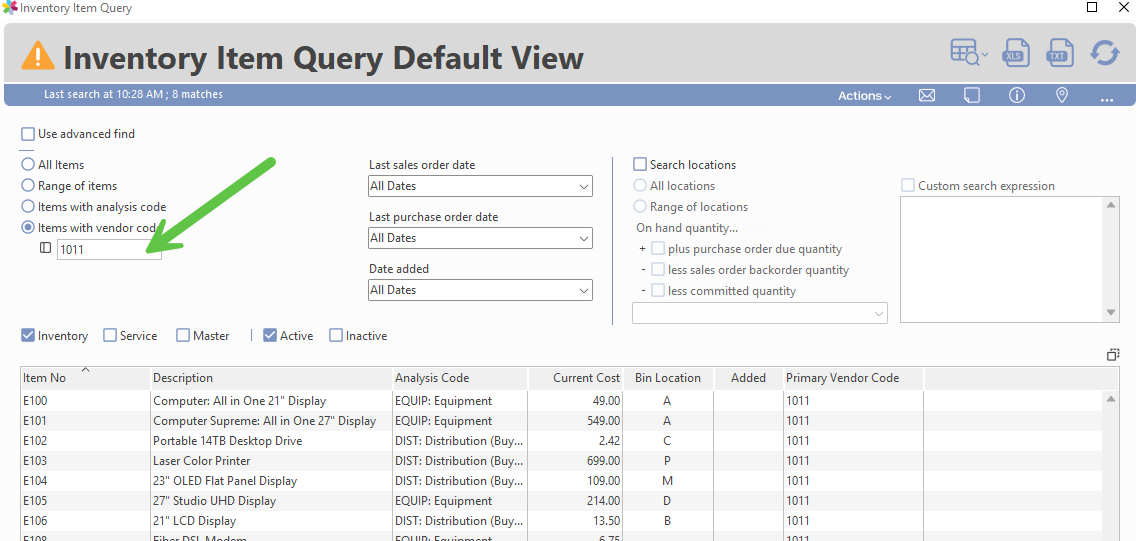
Starting at the Inventory Item Query default view, filter for a vendor code.
Next, after filtering for the first vendor code, save this view using Action → Save as New View.
Multiple views, one for each vendor code, can be saved and accessed easily from Actions Menu → Change View.
2. Related Articles
Was this article helpful?
That’s Great!
Thank you for your feedback
Sorry! We couldn't be helpful
Thank you for your feedback
Feedback sent
We appreciate your effort and will try to fix the article