Knowledge Base · Reporting & Ledgers
Applies to: All Supported Versions | Platform: macOS, Windows, Connected on Demand
ARTICLE CONTENTS
- Overview
- Available Ledger Windows
- User Access to a Ledger Window
- Example: Using the Sales Ledger Window
- Example: Connected Views with the Sales Ledger Window
- Customizing the Display Columns
- Exporting Ledger Data
- Other Actions
- Related Articles
1. Overview
Connected has a number of dynamic reporting tools called Ledger windows in each module that can supplement traditional reporting and help users get the information they're looking for. They can be customized, saved as templates, printed, and exported to a text file or spreadsheet.
Ledger windows allow users to access and view data in real time, ensuring that decisions are based on the most current information available. Unlike traditional reports, which are often static and predefined, ledger windows let users customize their information and filter data based on specific needs, providing a more tailored and dynamic analysis.
2. Available Ledger Windows
2.1 Sales and Receivables
- Receipts Ledger
- Sales Ledger
- Sales Order Ledger
- Sales Quote Ledger
2.2 Purchasing and Payables
- Purchases Ledger
- Payments Ledger
- Purchase Order Ledger
2.3 Inventory and Manufacturing
- Work Order Ledger
3. User Access to a Ledger Window
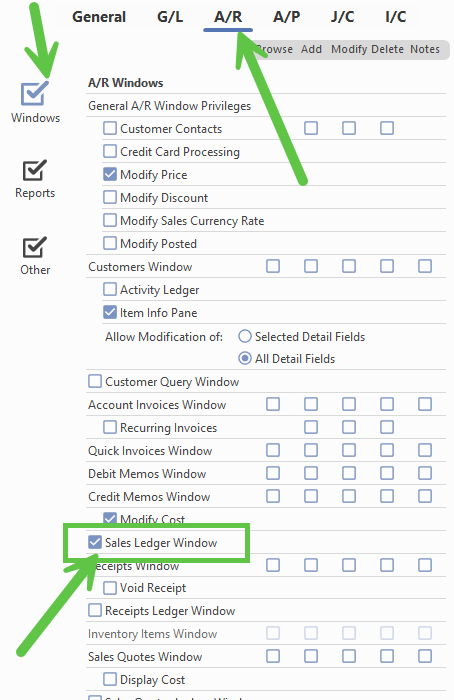
User access to Ledger windows needs to be granted through User Privileges. Each Ledger window is separate and needs to be checked in its respective module. See Introduction to Passwords, User Accounts, and Access Privileges for more information on how to assign User Privileges.
NOTE A user needs the appropriate user privileges assigned in order to view all the data in a Ledger window. If a user can't access a specific window, verify that all relevant access has been granted. |
Below is an example of where the access privilege is located for the Sales Ledger.
4. Example: Using the Sales Ledger Window
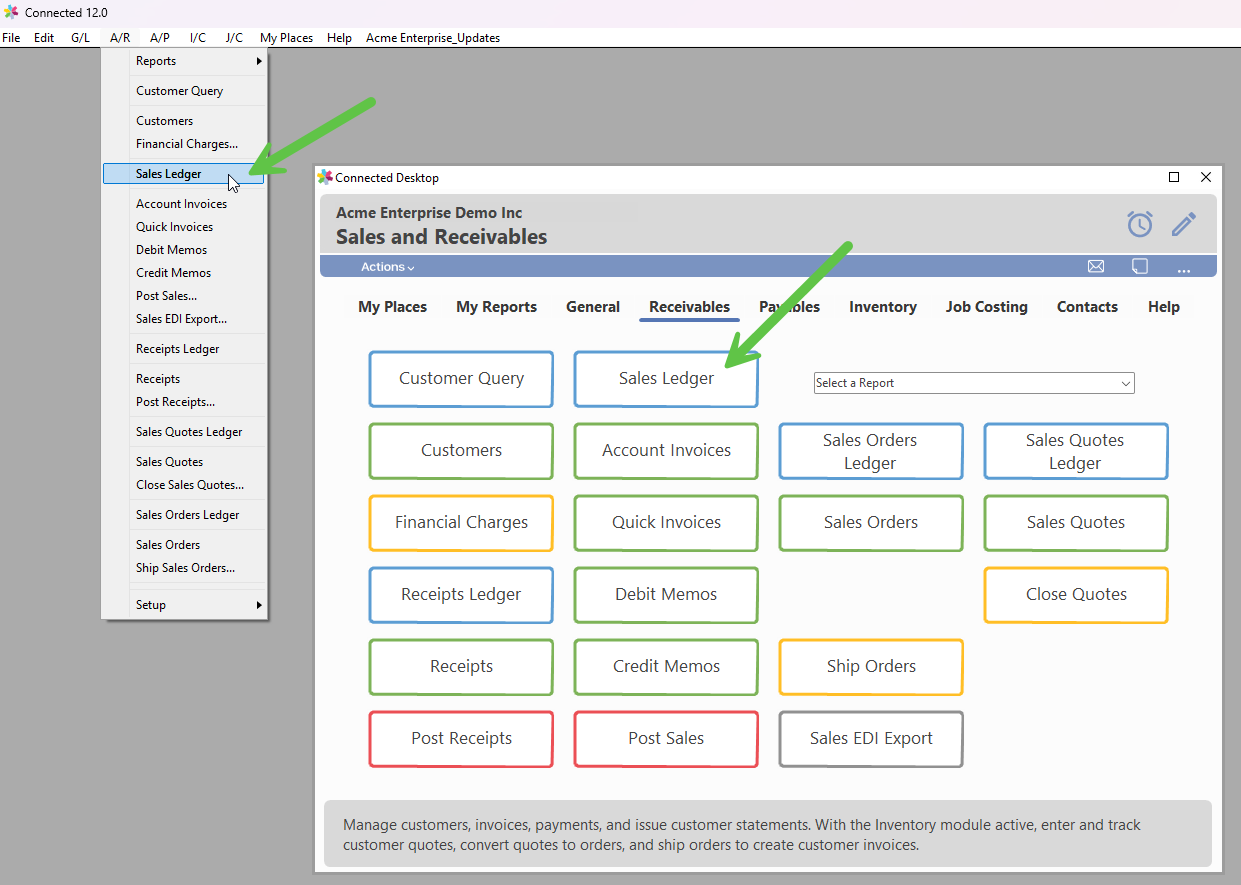
All Ledger windows can be accessed through the main menu bar or the Connected Desktop. Below is an example of how to access the Sales Ledger in the Sales and Receivables module.
TIP All Ledger windows in Connected work the same way. |
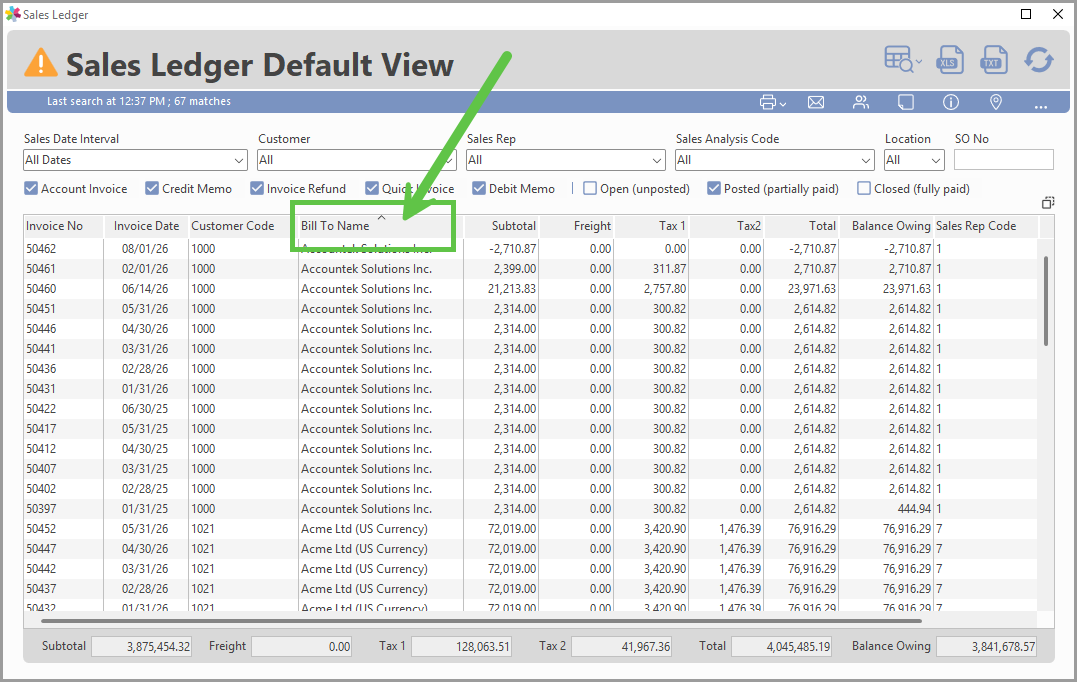
When the Sales Ledger is first opened, it shows a list of all unpaid invoices, sorted by invoice number, as shown below. This is the Sales Ledger Default View — learn more about Connected Views.
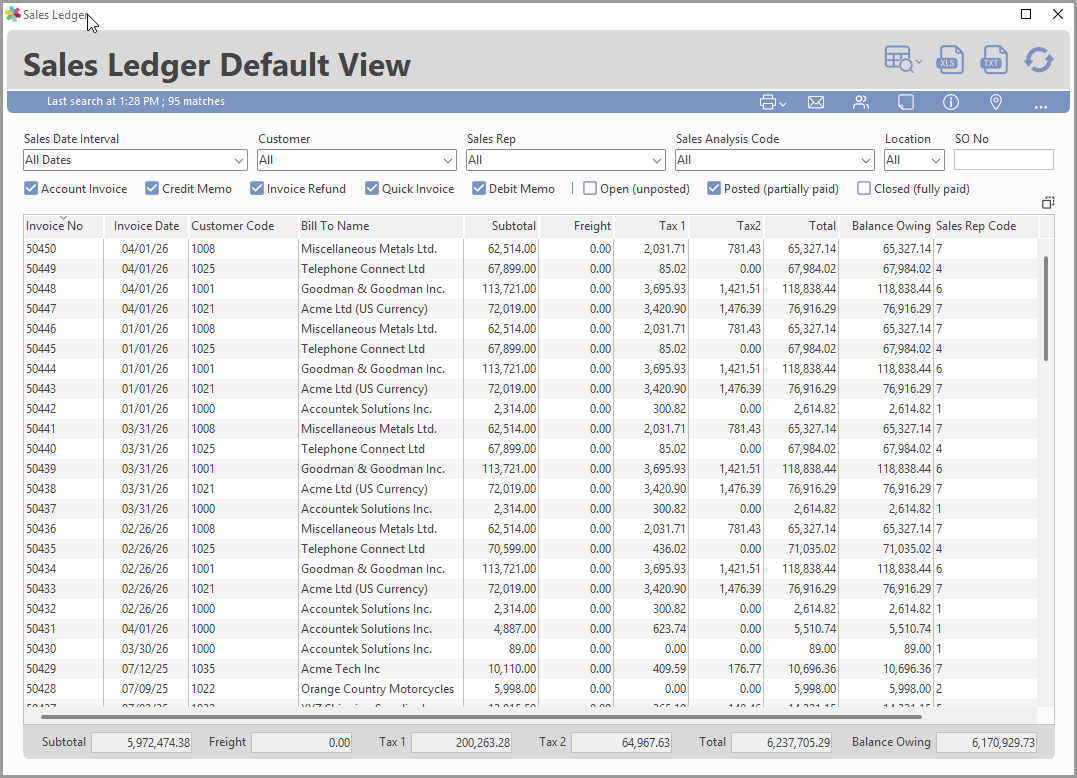
Along the top there are checkboxes, which let a user select the different types of transactions to include:
- Account Invoice
- Credit Memo
- Invoice Refund
- Quick Invoice
- Debit Memo
The status can also be filtered to include:
- Open (unposted)
- Posted (posted, not paid, or partially paid)
- Closed (fully paid)
The Sales Ledger window also has a series of quick lookup options, listed below:
- Sales Date Interval: Select a date range for invoices, including preset ranges and custom ones.
- Customer: Choose all customers, a specific customer, or use a Customer Analysis Code to select a pre-defined group of customers.
- Sales Rep: Select all sales reps, or an individual rep.
- Sales Analysis Code: Defaults to all, but you can specify one to look up.
- Location: Defaults to all, but for companies that use multiple locations, a specific one can be selected here.
- SO No: Sales Order Number — this lets a user filter for all invoices created from a specific sales order.
TIP Customer Analysis Codes are different from Sales Analysis Codes. Learn about the differences and how you can use them in Analysis Codes. |
Finally, each ledger has a Total Line at the bottom of every applicable column, which is dynamic and changes when criteria change or new data is entered into Connected, in real time as it's refreshed.
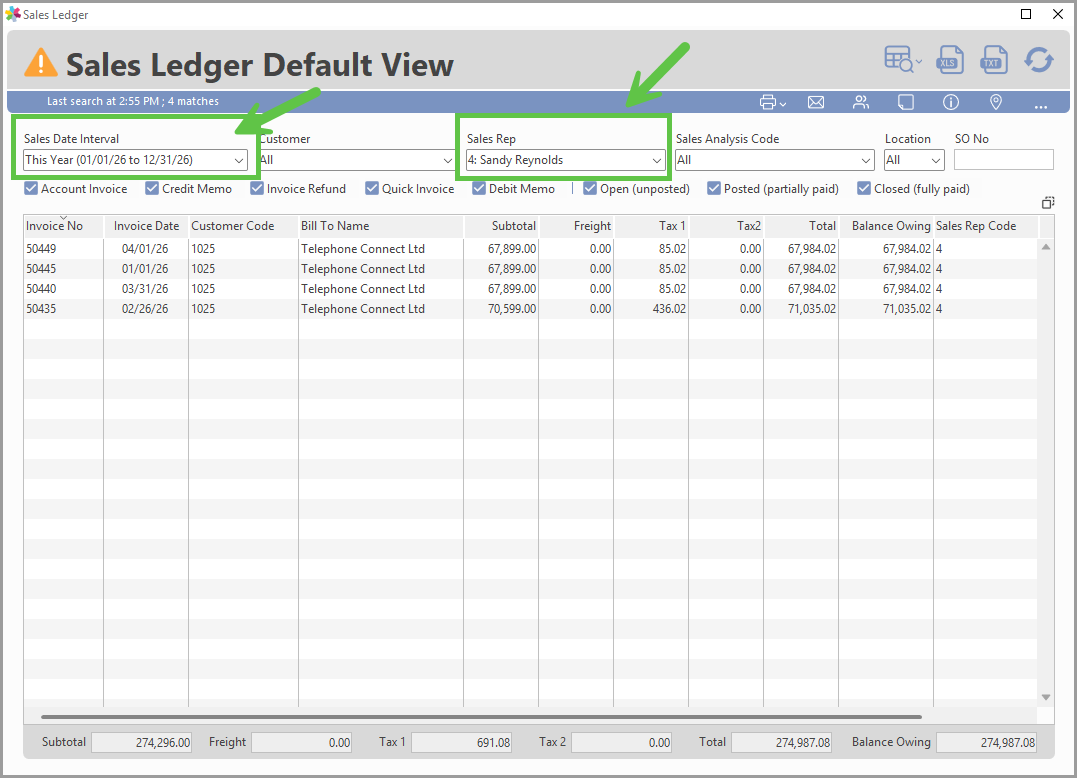
The screen below shows a sample Sales Ledger view, set for "Sales This Year (01/01/26 to 12/31/26)", including all customers, for the sales rep "4: Sandy Reynolds".
The following actions can be performed on the records displayed in the Sales Ledger:
Drill Down: A user can drill down to any source document shown in the window by double-clicking that line. This opens the corresponding Account Invoice, Credit Memo, Invoice Refund, or Debit Memo window.
Sort: Sort the displayed data by a specific column by clicking the column heading. An arrow appears at the top of the column heading, indicating the sort. Click the same column again to invert the sort.
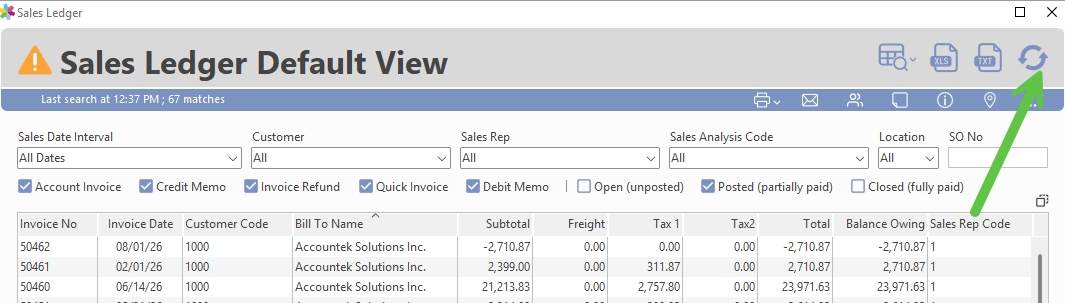
Refresh: As data changes (customer invoices entered, posted, paid), the Refresh button updates the ledger display with the most current information. The window can also be closed and reopened to refresh the display.
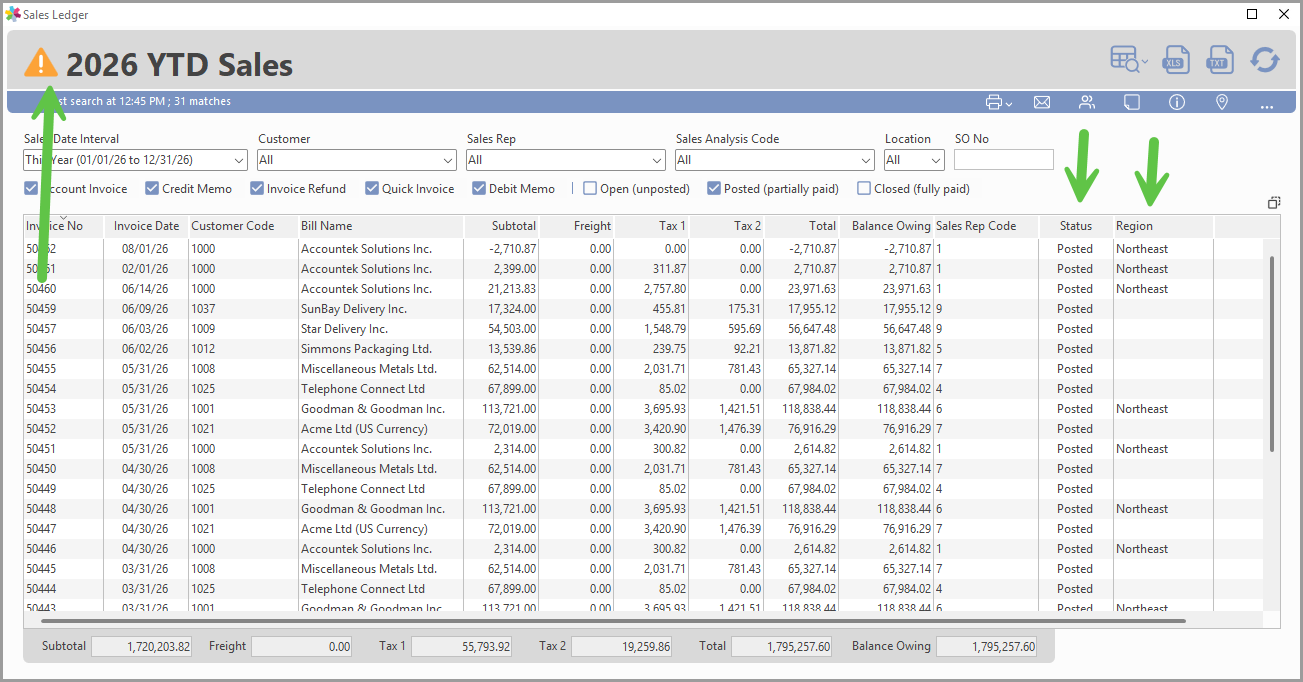
 This icon indicates that changes have been made to the current ledger layout (filter options, sorting, new columns). These changes can be saved using Connected Views.
5. Example: Connected Views with the Sales Ledger Window
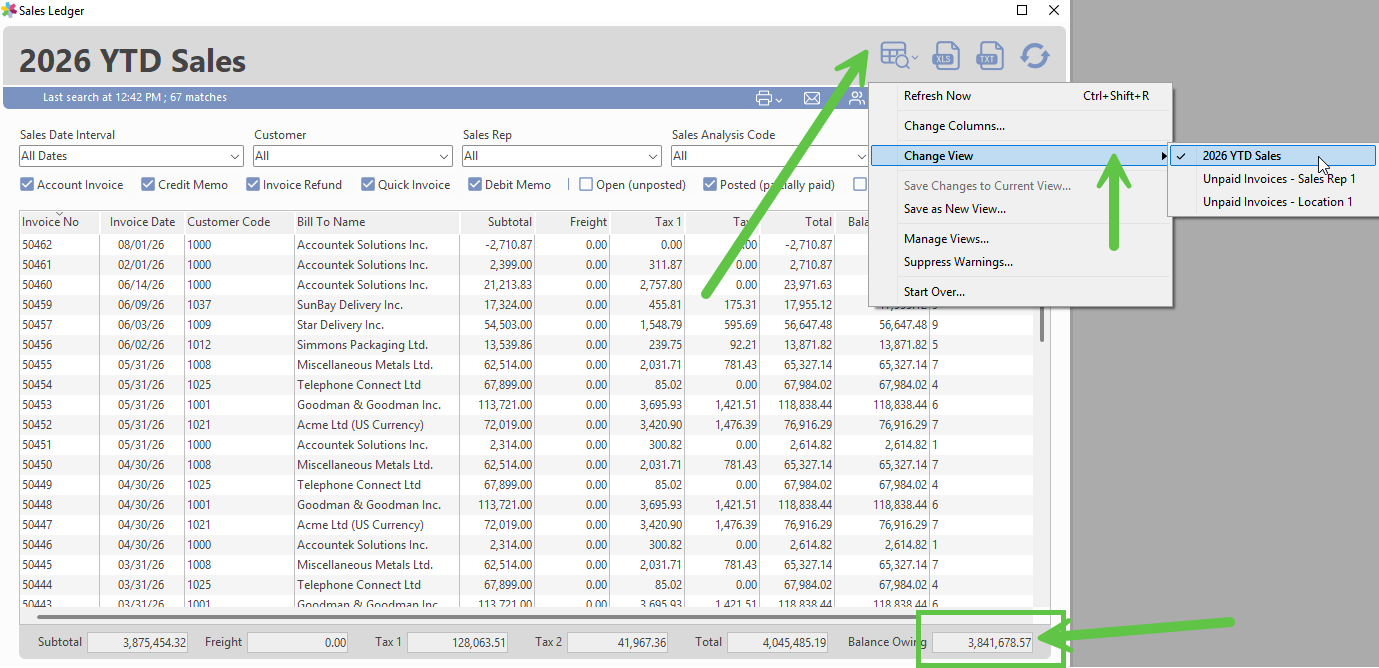
Connected Views is a feature available in all Ledger windows in Connected. Learn how to use Connected Views.
There are a number of ways to use Connected Views in the Ledger windows.
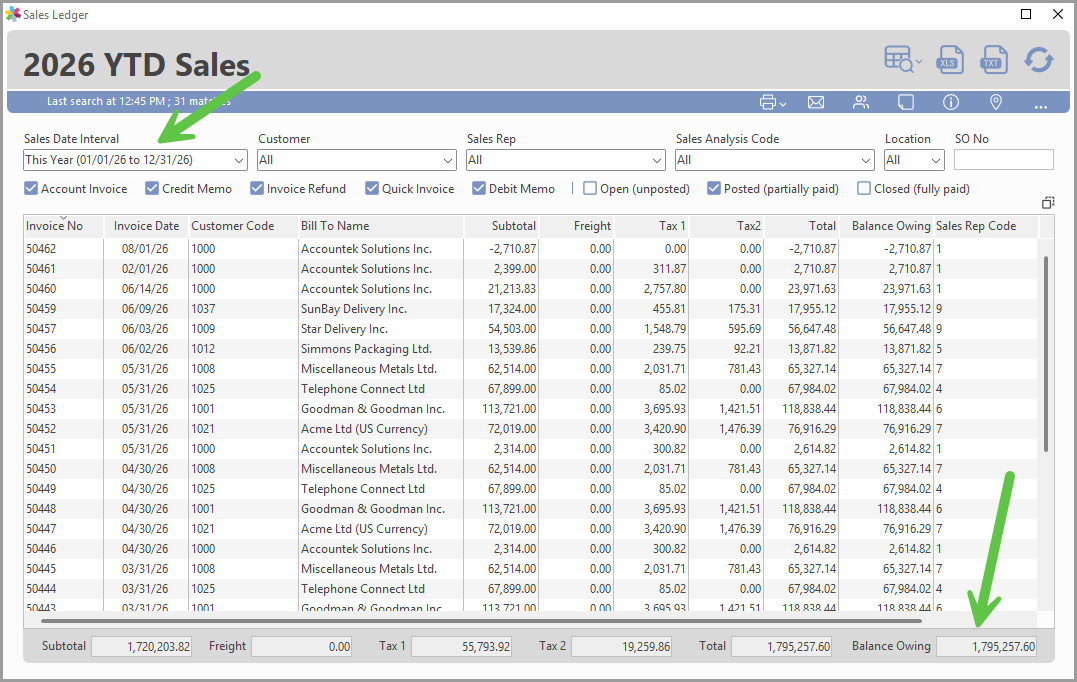
Example: A saved view, filtering for all sales YTD (Jan 1 – Dec 31, 2026), showing all invoices (unposted and posted), (paid and unpaid), sorted by most recent invoice date.
NOTE The totals at the bottom change as the view changes. |
6. Customizing the Display Columns
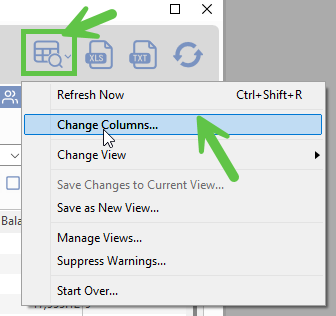
The columns in any Ledger window can be customized to suit individual user needs. There are many different columns to choose from. The steps below walk through how to change the displayed columns and save the changes as a Connected View.
In this example, two columns were added: Status and Region.
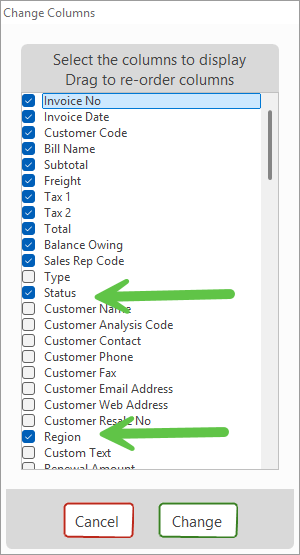
After clicking Change, the Ledger window updates with the new columns.
NOTE The order of the columns in the Ledger window can be changed by clicking the desired column heading, holding the mouse button, and dragging it into a new position in the list. When Connected or the Ledger window is closed, the columns are saved in the exact order they were in when the user logged off or closed the window. Each user can have their own unique column settings, tied to their username and password, in conjunction with Connected Views. |
To save this as a new view, select Save as New View from the menu.
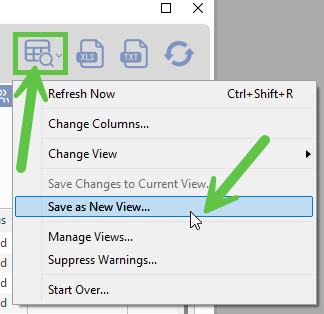
Once a view has been saved, a user can select it at any time, and the data will refresh.

7. Exporting Ledger Data
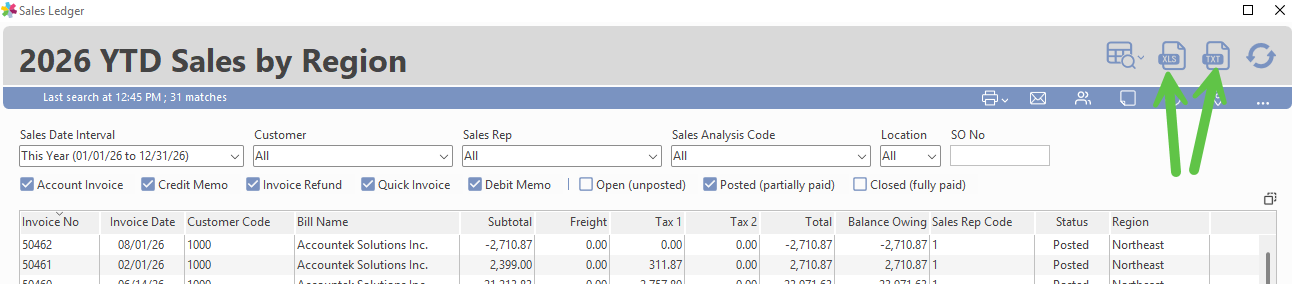
To export the data in a Ledger window, select Text File or Spreadsheet from the Print menu, as shown below.
8. Other Actions
8.1 Pinning a Record
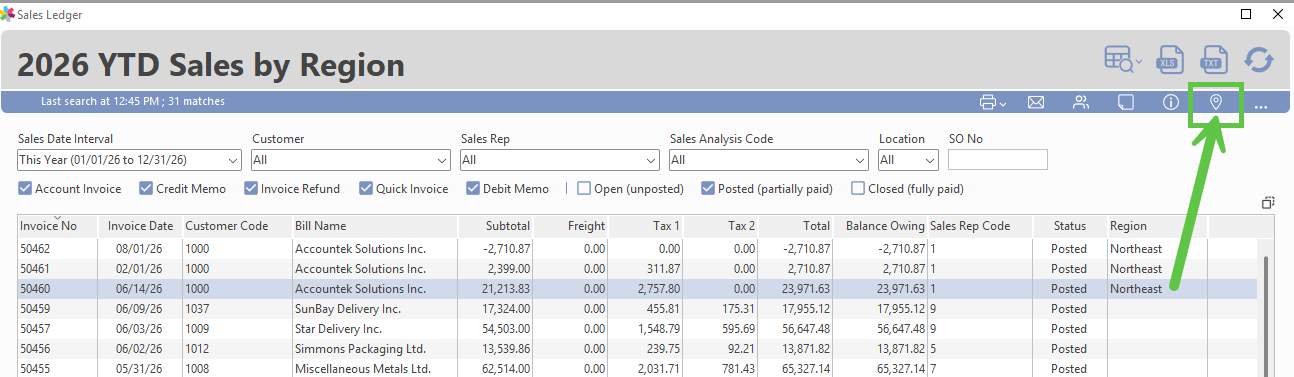
To pin a source document in a Ledger window, select the Pin icon when the line item is selected, as shown below.
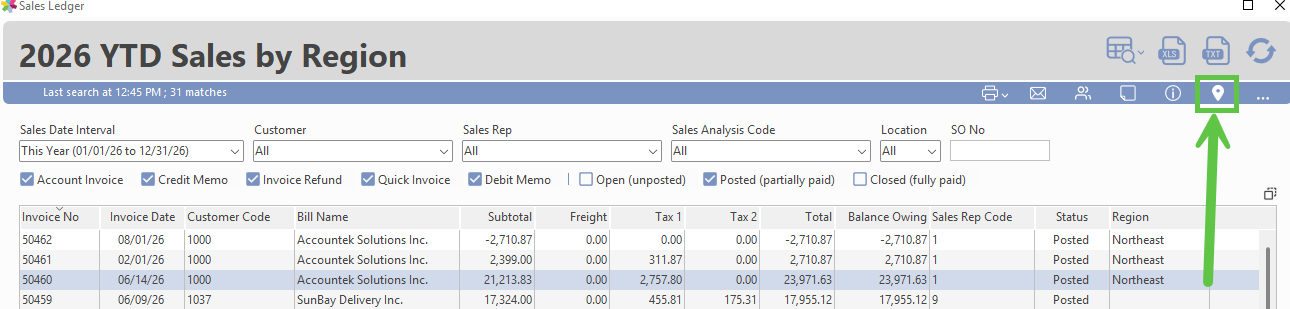
If a record has already been pinned, the Pin icon shows this when the record is clicked.
Learn more about how Connected Pins work.
8.2 Adding/Viewing Notes, Attachments and Reminders Using the Ledger Window
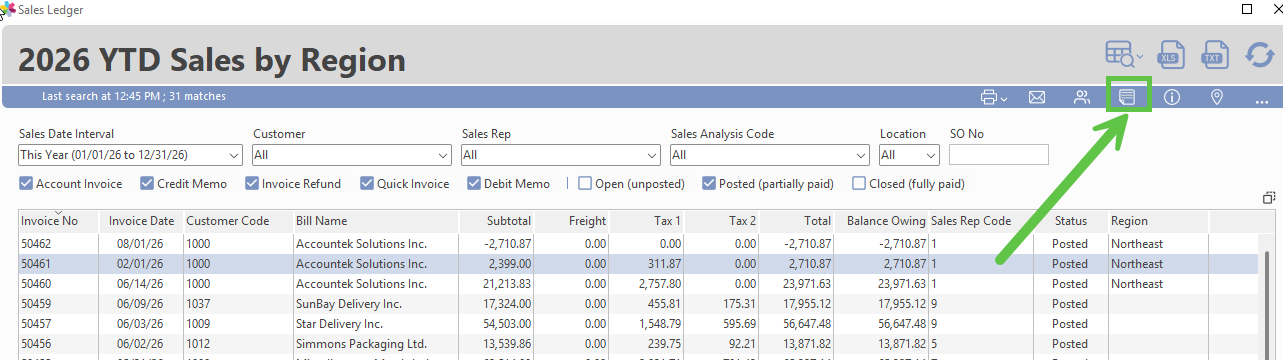
Using the Sales Ledger as an example, you can add or view any Notes, attached files, or Reminders entered on an invoice, directly within the Ledger window. If an invoice has a note, it shows as below. You can click the Note icon and view the note without having to open a separate window, and you can also create or modify existing notes from within this window, and attach files to them.
Learn how Connected Reminders and Notifications and Using and Linking (Attaching) Files to Notes work in Connected.
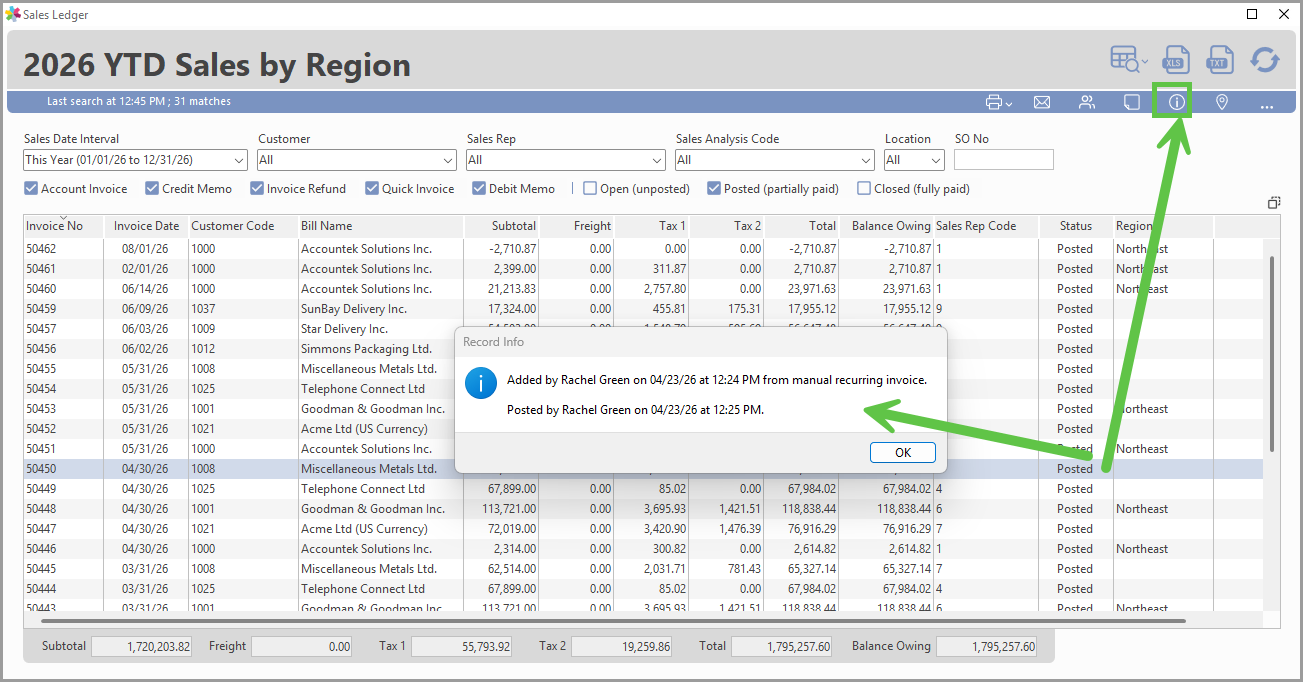
8.3 Viewing Record Info from the Ledger Window
To view the record info for a line item in a Ledger window, click the line, then click the Info (i) icon, as shown below.
9. Related Articles
Was this article helpful?
That’s Great!
Thank you for your feedback
Sorry! We couldn't be helpful
Thank you for your feedback
Feedback sent
We appreciate your effort and will try to fix the article